Part 49 of the HikeLab Ultimate Ultralight Guide Series.
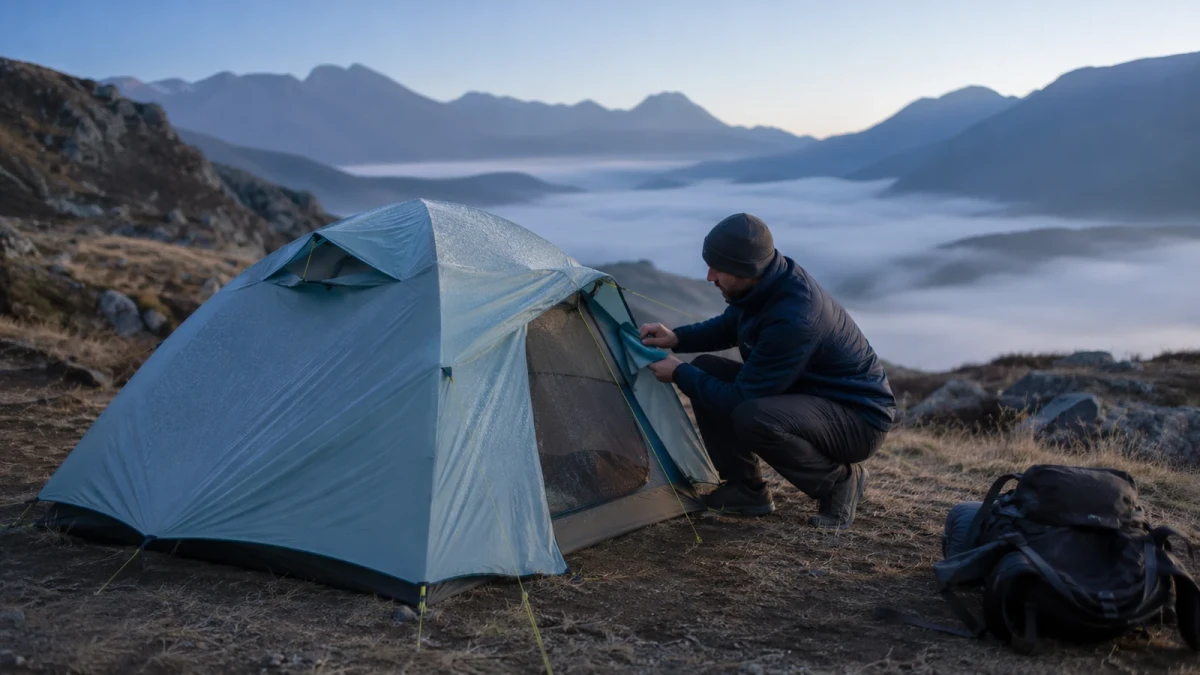
If you’ve ever crawled into your tent dry and woken up to a cold mist on your quilt, you know how miserable condensation can be. Learning how to prevent tent condensation on backpacking trips matters because that moisture usually isn’t a leak. It’s warm, damp air from your breath, body heat, wet gear, and campsite conditions collecting on the coldest surface around you.
The frustrating part is that even good tents can get wet inside. The useful part is that condensation follows patterns, and patterns are manageable. When you understand where the moisture comes from, how your campsite changes the air around you, and how your setup traps or releases humidity, you stop guessing. This guide will show you what actually works before camp, during setup, overnight, and the next morning so you can keep your shelter, sleep system, and morale in much better shape.
Key Takeaways
- Tent condensation is mostly a moisture-management problem, not a tent-failure problem.
- Campsite selection often matters more than tent brand when humid nights roll in.
- Ventilation only works if your fly is pitched taut and air can move through the shelter.
- Wet gear, damp clothes, and overcrowded tents spike interior humidity fast.
- On backpacking trips, the real win is not “zero condensation” but keeping moisture off your insulation and drying the tent quickly.
Why tent condensation happens fast in the backcountry
Condensation forms when warm, humid air meets a colder surface and drops water onto it. In a backpacking tent, that cold surface is usually the rainfly or tent wall. Your job isn’t to stop physics. Your job is to control how much moisture builds up inside and how easily it can escape.
Backpackers deal with more condensation than casual campers because the margins are smaller. You’re often in compact shelters, you’re wearing damp layers from the day, and you’re camping in valleys, forests, or near water because those spots are convenient. Add a temperature drop after sunset, and the inside of the tent turns into a tiny greenhouse.
Manufacturers like MSR and NEMO both point to the same core drivers: weather, people, and wet surroundings. Adults can release roughly 1 to 2 pints of moisture overnight through breathing and skin evaporation, which is why a sealed tent gets clammy fast. If you want the brand-level explanation, see MSR and NEMO.
One important mindset shift helps here: some condensation is normal. If you expect a perfectly dry fly every morning, you’ll think your tent is failing when it isn’t. The goal is to keep the moisture on the outer surfaces, keep it off your bag or quilt, and keep it from compounding over several days.
How to Prevent Tent Condensation on Backpacking Trips Before You Pitch
Your best condensation fix usually happens before the tent comes out of the stuff sack. Site choice changes humidity, temperature, airflow, and how much dew settles around you. That makes it the highest-value decision of the night.
Stay away from the obvious moisture traps
Water views are nice. Sleeping beside a lake, creek, meadow bottom, or marsh usually isn’t. These spots hold more moisture and often collect colder air after sunset, which increases condensation risk.
Set up a little farther from water than your tired brain wants to. You’ll usually get better air movement and a drier microclimate. That lines up with both common manufacturer advice and basic Leave No Trace camping habits.
Pick slight elevation, not the lowest flat patch
Cold air drains downhill and pools in low spots. That’s why the valley floor or little depression that looks perfectly sheltered can feel damp by dawn. A small rise, bench, or gently elevated patch often performs better.
You don’t need to camp on an exposed knob. You just want to avoid the cold sink where humid air settles. Even a few feet of elevation can help.
Use tree cover wisely
Light tree cover can reduce dew load and create a slightly warmer microclimate. That can help, especially on still nights. Dense tree cover, though, can also block wind and keep the air stagnant.
The sweet spot is filtered cover with some airflow, not a dead-calm pocket under heavy canopy. Always prioritize safety and avoid dead branches or “widowmakers.”
Maya learned this in the Smokies on a shoulder-season trip. The first night, she pitched beside a creek because it was flat and scenic, then woke up to a wet footbox and droplets raining down each time she brushed the mesh. The second night, she moved to a small bench 150 feet higher and farther from water, opened both vents, and woke up with a damp fly but a dry quilt. Same tent, different site, totally different result.
If you’re still choosing a shelter for humid climates, The Ultralight Tent and Shelter Guide should be part of your trip prep before you buy on weight alone.
How to Prevent Tent Condensation on Backpacking Trips With Better Setup
A great campsite can still turn sloppy if the tent is pitched badly. Condensation gets worse when the fly sags, the inner touches the outer wall, or you close every vent because the air feels chilly at bedtime.
Pitch the fly taut and preserve separation
A loose rainfly kills airflow and increases contact between layers. Once the inner tent touches the wet fly, the moisture transfers inward and your sleeping bag pays for it.
Take the extra minute to tension guylines and re-tension after the fabric relaxes. This matters even more in humid weather, where sag shows up fast. Trail Hiking’s guide gets this part right: fly separation is one of the most useful technical details most general articles skip.
Create cross-ventilation, not random openings
One cracked vent helps a little. Two openings that let air move across the shelter help much more. Open opposing vents if your tent has them. If conditions allow, crack the door at the top where warm, moist air gathers.
Think in terms of airflow path. Where does air enter, and where does humid air escape? If the answer is “nowhere,” condensation is going to win.
Face the tent for the night you’ll actually get
If there’s a mild, steady breeze, orient a door or low vent toward it. If hard rain is blowing sideways, protect the opening that would funnel water inside and use the safer vent combination instead. Don’t chase a perfect textbook setup when the weather says otherwise.
Don’t seal the tent just to feel warmer
This is one of the most common mistakes. A fully buttoned-up tent can feel cozy for an hour, then colder by morning because everything inside is damp. A little airflow often improves comfort even when the air itself is cooler.
On a windy September trip in Colorado, Luis shut every vent in his ultralight tent because the temperature was dropping fast. By 3 a.m., the inside walls were slick, his hat was wet where it brushed the canopy, and his socks never dried. The next night he left the peak vents open and cracked the zipper from the top. The shelter felt slightly cooler at first, but the bag stayed lofted and the morning felt warmer because it was drier.
For a deeper basics refresher, REI’s condensation guide is still one of the clearest simple explainers.
Cut the moisture you bring inside
You can’t stop breathing, but you can stop turning the tent into a drying room. Interior moisture sources are the easiest ones to control, and they compound quickly on backpacking trips.
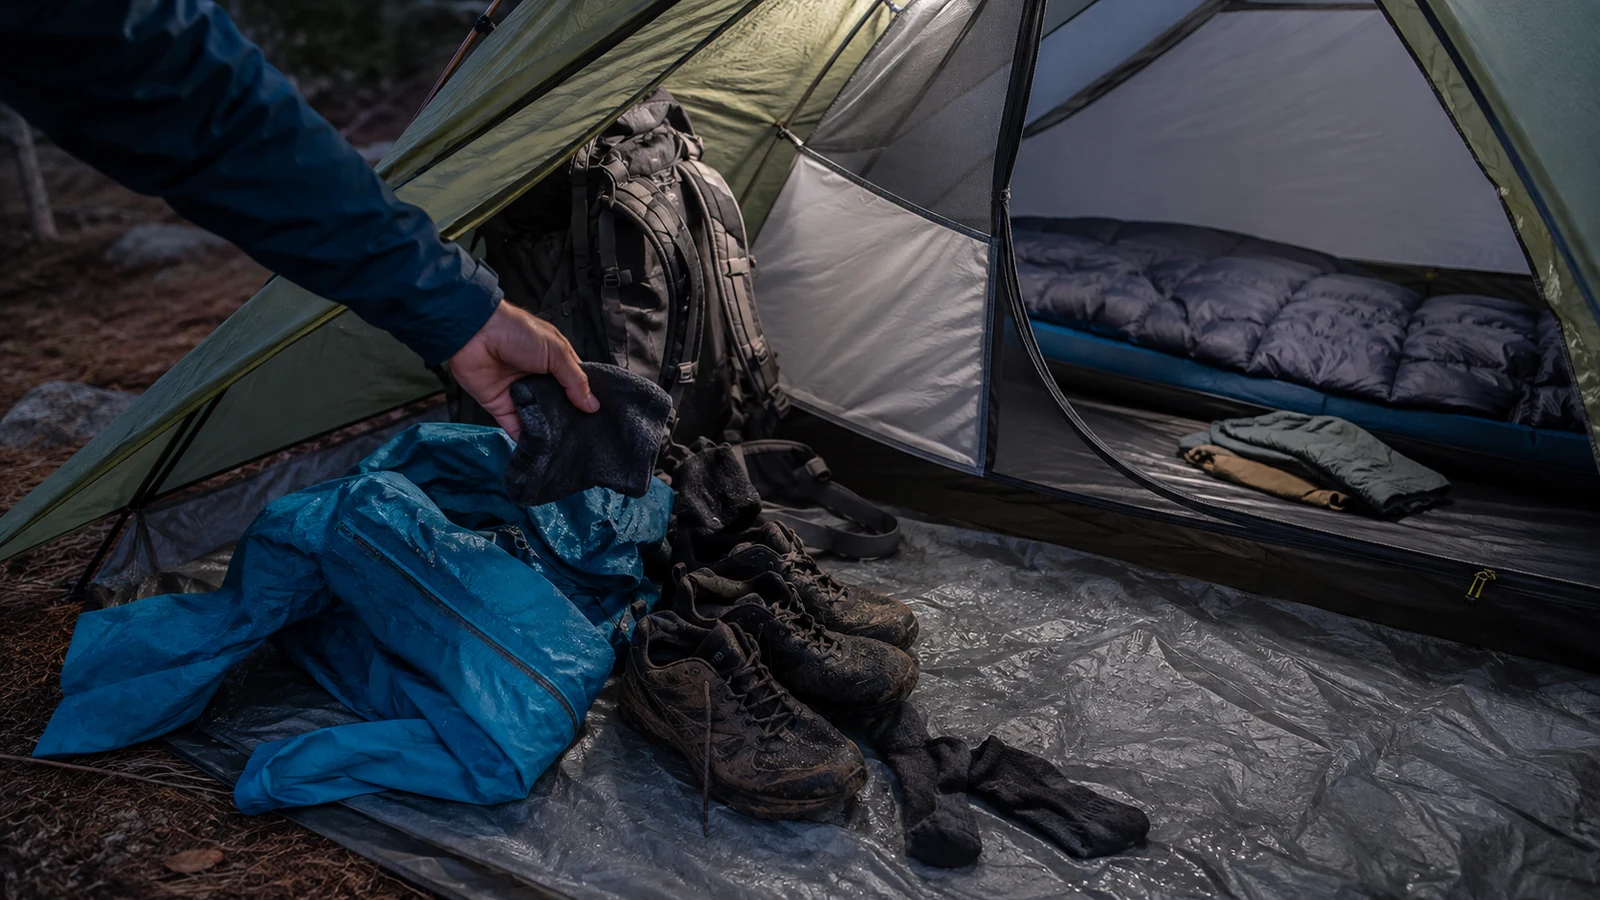
Keep wet gear in the vestibule
Rain jacket, shoes, pack, damp socks, and a soaked dog all add moisture to the air. Store wet items in the vestibule whenever possible. If something has to come inside, wring it out, shake it off, and isolate it from your insulation.
A small trash compactor bag or pack liner helps here. Wet gear goes in its own zone instead of humidifying your sleeping area all night.
Change into dry sleep clothes
Dry base layers do more than feel good. They reduce the moisture load you carry into the tent. Sleeping in the damp shirt you climbed in makes your shelter wetter and your sleep colder.
This is one of the highest-return clothing habits on wet trips. It’s also why dedicated sleep socks are worth the tiny weight penalty.
Don’t cook in the tent unless safety demands it
Steam from hot drinks and meals adds water vapor fast. In serious storms, people push this line, but as a standard backpacking habit it’s a bad trade. Cook outside the tent or at least in a well-ventilated vestibule only when your shelter design and safety conditions make that appropriate.
Watch your breathing position
If you sleep with your face buried in the top of your quilt or pointed straight at the wall, you’re dumping warm moisture onto nearby fabric. Keep your nose and mouth clear of the bag and away from the tent wall when possible.
Mid-trip is a good time to audit your whole wet-weather system, not just the tent. The Wet Weather Ultralight System can save more misery than another expensive gear purchase.
Choose gear that helps instead of hurts
Skill matters most, but gear still changes how forgiving your shelter system feels. If condensation is a regular problem on your trips, the solution may be a better match between your shelter, pad, and sleep setup.
Double-wall tents are easier to live with
A double-wall tent won’t eliminate condensation, but it usually manages it better by keeping most moisture on the fly instead of right above your face. That gap buys you margin.
Single-wall shelters can work well, especially for weight-conscious hikers, but they demand tighter site choice, better airflow, and more attention to interior contact. If you’re often in humid forests or shoulder-season conditions, a double-wall design is usually easier to recommend.
More livable space reduces contact moisture
Two people stuffed into a tiny tent create more humidity in a smaller air volume. They also brush the walls more often. A slightly roomier shelter or a better-matched pad layout can reduce both problems.
This matters more than many buyers think. If your pad or quilt constantly presses the sidewalls, even a well-vented tent becomes a moisture transfer machine.
Vent design matters more than marketing copy
Look for high vents, opposing vents, fly geometry that maintains airflow, and doors you can crack from the top. A tent that advertises low weight but gives you weak vent control may cost you more comfort than it saves in ounces.
Pack one tiny condensation tool
A small microfiber cloth is worth its place in almost every backpacking shelter kit. When conditions get ugly, it turns drips into a manageable five-minute cleanup job. That’s far better than letting your bag soak while you hope it dries later.
If humid overnights are common where you hike, compare your current setup against Ultralight Sleep Systems before your next trip. One small gear mismatch can keep creating the same problem.
What to do when condensation is unavoidable
Some nights will beat your prevention plan. Rain all evening, saturated air, still conditions, and a packed campsite can leave you with a wet fly no matter what you do. At that point, the goal changes from prevention to damage control.
Wipe first, then pack smart
If the walls are wet in the morning, wipe them down before you start moving around inside. That keeps droplets from shaking loose onto your quilt and clothing. Wipe the fly, then the inner if needed.
When you break camp, separate the wet fly from the dry inner or keep the damp shelter in an exterior pocket. Don’t pack it against your insulation if you can avoid it.
Dry the tent during breaks, not just at camp
Many backpackers wait until evening to think about the tent again. That’s too late. If the sun appears at lunch or you catch a breezy break on a ridge, pull the fly out and dry it then.
Erin and Max used this trick on a three-night trip in Washington after nonstop drizzle. Every morning the fly was soaked, but they packed it separately and spread it over bushes during lunch whenever the rain eased. Their shelter never got fully dry until the last day, but their sleeping bags stayed protected because the moisture never sat trapped against the rest of their gear.
Protect the insulation first
A damp tent is annoying. A damp quilt or sleeping bag can become a safety problem. Keep insulation off the walls, keep dry clothing in waterproof storage, and prioritize the sleep system over everything else when space is tight.
Know the difference between condensation and leaks
Condensation usually shows up as widespread moisture or droplets on the inside surface, especially after cool, still, or humid nights. A leak is more localized and often tied to a seam, damaged coating, or specific rainfall pattern.
That distinction matters because many hikers troubleshoot the wrong problem. If you’re seeing widespread moisture after a cold night, behavior and setup are more likely to fix it than seam sealer.
A simple condensation routine for every trip
The best backpackers don’t rely on memory when they’re tired. They run a repeatable system. That’s the easiest way to prevent a small moisture problem from snowballing over several nights.
At camp
Pick slightly elevated ground. Stay off the water’s edge. Look for some airflow. Pitch the fly taut. Open the vents immediately instead of “later.” Put wet gear in the vestibule. Change into dry sleep clothes.
Before bed
Re-tension the fly if the fabric has relaxed. Crack at least two vent points if weather allows. Move your quilt or bag away from any wall contact. Make sure your microfiber cloth is easy to reach.
In the morning
Wipe the inside before you sit up and bump the shelter. Separate wet and dry components. Dry the fly at the first real chance, even if that chance shows up in the middle of the day.
That routine is simple, but it works because it covers the full cycle: reduce moisture load, keep airflow moving, prevent transfer to insulation, and stop yesterday’s dampness from becoming tomorrow’s bigger problem.
If you want one more prep step, add a shelter check to The Beginner Ultralight Gear List so vents, guylines, and a wipe cloth are never an afterthought.
FAQ
How do I stop condensation in a tent when it rains all night?
You usually won’t stop it completely. Focus on damage control: pitch the fly taut, keep at least some venting open, store wet gear in the vestibule, and wipe the walls before moving around in the morning. Then pack the wet fly separately and dry it during the first break in weather.
What causes tent condensation if my tent isn’t leaking?
Most tent moisture comes from warm, humid air hitting cooler fabric. Your breath, body heat, damp clothes, wet ground, nearby water, and falling overnight temperatures all contribute. A tent can be perfectly waterproof and still collect lots of interior condensation if airflow is poor.
Which tent is best for reducing condensation: single-wall or double-wall?
Double-wall tents are usually better at managing condensation because the fly and inner body are separated. That means moisture tends to stay farther from you and your insulation. Single-wall shelters can work well, but they demand better site selection, stronger airflow, and more care to avoid wall contact.
When should I leave tent vents open in cold weather?
Almost always, unless wind-driven weather makes a specific opening unusable. Cold air alone isn’t the enemy. Trapped moisture is. A slightly cooler, drier tent often feels warmer by morning than a sealed tent with wet walls, damp insulation, and heavy air.
Why is my sleeping bag or quilt wet at the footbox?
Usually because it touched a damp tent wall or sat too close to a condensation-heavy area near the foot end. Tight tents, long pads, and puffy footboxes make this more likely. Re-tension the fly, create more separation, and check that your sleep system fits the shelter.
Manage the Moisture Before It Manages Your Sleep System
Backpackers often treat condensation like bad luck, but it’s usually a chain of small decisions. Camp too close to water, pitch in a low pocket, bring wet layers inside, close every vent, and the tent gets soaked. Move a little higher, keep airflow moving, separate wet gear, and protect your insulation, and the whole night changes.
That’s the real answer to tent condensation on backpacking trips: manage moisture before it builds, not after it starts dripping. You do that with smarter campsite choices, a cleaner setup, better overnight habits, and a quick morning recovery routine.
Before your next trip, do one practical thing: pack a microfiber cloth, check your vent options, and rehearse your shelter routine once at home. Then use it in the field. If condensation keeps showing up anyway, treat that as feedback and upgrade the weak point, whether it’s the campsite, the pitch, or the shelter itself.
Next Steps
- Read The Ultralight Tent and Shelter Guide to match shelter design to your climate.
- Check Trekking Pole Tents in Wind and Rain for pitching a single-wall shelter that still breathes.
- Review The Wet Weather Ultralight System to keep damp gear from following you into the tent.
Sources
- REI — How to Prevent Condensation in a Tent — site choice, moisture sources, and ventilation
- MSR — How do I prevent tent condensation? — manufacturer guidance on airflow and pitch
- NEMO — Why does condensation form inside my tent? — the physics behind a wet inner wall
- Sea to Summit — 7 Ways to Manage Tent Condensation — practical prevention checklist
Einen Kommentar hinterlassen