Part 48 of the HikeLab Ultimate Ultralight Guide Series.
Have you ever finished a wet hike, looked at your soaked shoes, and thought, “There’s no way these will be dry by morning”? That panic leads a lot of hikers to make the same mistake: they blast their shoes with heat and quietly ruin the glue, leather, foam, or waterproof lining.
The better move is simpler. If you want to know how to dry wet hiking shoes overnight without damage, you need airflow, absorbent material, and a setup that pulls moisture out without cooking the shoe. Major care guidance from REI, LOWA, Hanwag, and ASICS all points in the same direction: remove insoles, dry at room temperature, and keep shoes away from strong heat.
This guide gives you the fastest safe overnight method, shows what to do for leather, mesh, and waterproof shoes, and helps you avoid the damage that turns one rainy hike into a replacement bill.
Key Takeaways
- The safest overnight method is: remove insoles and laces, blot moisture, stuff the shoes with absorbent paper, and place them in front of a fan.
- Direct heat from radiators, fireplaces, dryers, or strong sun can weaken adhesives, crack leather, and warp shape.
- Waterproof hiking shoes often dry slower than non-waterproof trail shoes because moisture gets trapped inside.
- Changing the stuffing once before bed or early in the evening can make a big difference by morning.
- If you hike in wet weather often, a small home drying station saves time and extends shoe life.
Why Wet Hiking Shoes Get Damaged So Easily
Wet shoes aren’t the real problem. Fast, uneven drying is.
When hiking shoes get soaked, water settles into the lining, footbed, tongue, toe box, and foam around the collar. If you hit that moisture with strong heat, the outside dries first while the inner layers lag behind. That stress can stiffen leather, weaken glue, and leave waterproof shoes feeling oddly crunchy or misshapen.
That’s why the “just put them by the heater” trick backfires so often. REI and LOWA both warn against direct heat, and Hanwag gives the same advice for wet boots and shoes.
Mark learned this the expensive way after a rainy weekend in the White Mountains. He set his leather hikers beside a radiator so they’d be dry for work the next day. By morning, the toe rand had started lifting, the leather felt hard, and the boots never flexed the same way again. He saved eight hours and lost a $220 pair of shoes.
If you hike in wet climates more than a few times each season, set up a basic drying kit now: one fan, paper towels or plain newsprint, a dry towel, and a spot with good airflow. That small system matters more than any “hack.”
What to Do in the First 10 Minutes After the Hike
The first few minutes matter because trapped moisture gets harder to remove the longer it sits.
Take the shoes off as soon as you get home or back to camp. Remove the insoles and loosen or remove the laces. Insoles hold a surprising amount of water, and tight laces keep the upper from opening enough for airflow.
Next, wipe away mud, grit, and standing water. You don’t need a full deep clean unless the shoes are filthy, but you should remove the wet outer layer of trail mud. Mud keeps moisture against the upper and slows drying.
Then blot, don’t rub. Use a towel to press against the toe box, tongue, heel, and collar. You’re trying to pull off surface water before you start pulling moisture from the inside.
Jenna came off a soaked fall hike in Shenandoah with mesh trail shoes that squished when she walked. Instead of leaving them by the door, she pulled the insoles, blotted the uppers, stuffed the shoes with paper towels, and aimed a box fan across them. At 6:00 a.m., the shoes weren’t brand new dry, but they were comfortable enough for a second trail day.
This is also the best point to separate wet socks, insoles, and gaiters. Don’t leave them piled on top of the shoes. Spread them out so everything dries faster.
Once the shoes are dry, a proper clean matters too — mud left in the mesh holds moisture into the next trip.
The Safest Overnight Drying Method, Step by Step
This is the safest fast method for most hikers, most homes, and most shoe materials.
Step 1: Open the shoe up
Pull out the insoles. Loosen the laces all the way, or remove them if the shoes are soaked. Open the tongue wide so the inside can breathe.
If the shoes have removable sockliners, dry them flat on a towel or near the same fan. Don’t put them back in until everything is actually dry.
Step 2: Stuff the inside with absorbent material
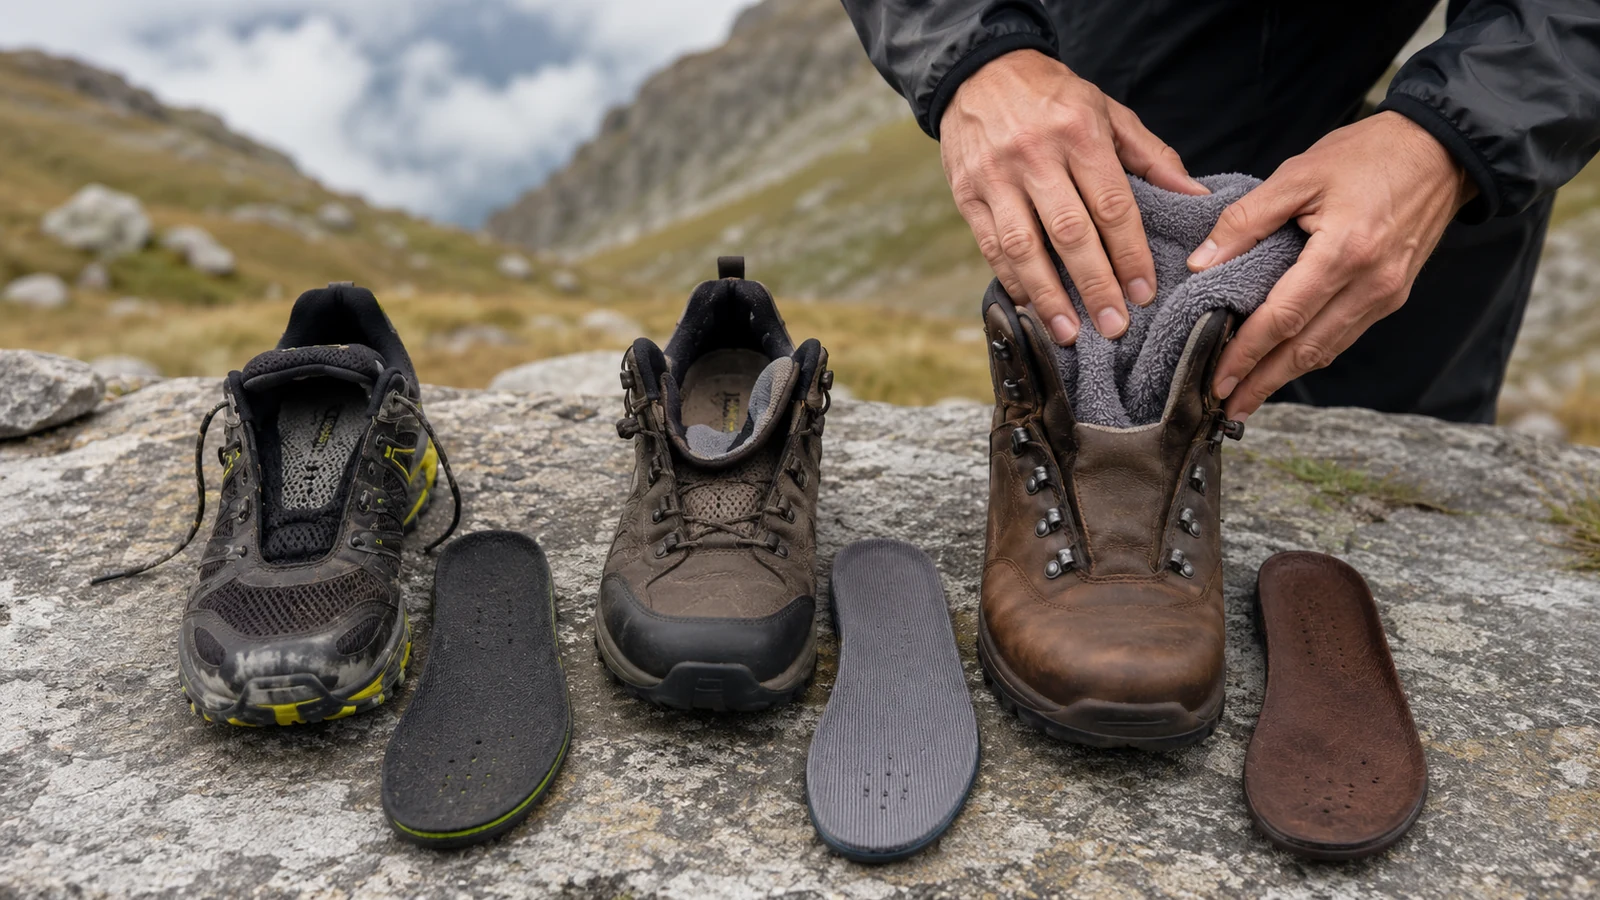
Use plain newsprint, paper towels, kitchen paper, or uncoated packing paper. Crumple it loosely and fill the toe box, midfoot, and heel.
Don’t pack it rock-hard. You want absorption plus airflow, not a paper cork.
Change the stuffing once if you can, ideally after 30 to 90 minutes for very wet shoes or once before you go to sleep. That second round often removes the biggest remaining pocket of moisture. Hanwag and REI both recommend frequent changes because the first stuffing gets saturated fast.
Avoid glossy magazine pages. They don’t absorb well, and the ink can transfer.
Step 3: Add moving air
Place the shoes on their side or upright in front of a fan. Aim the airflow across the shoe opening, not with a hair dryer blasting into one spot.
A box fan, desk fan, or standing fan works. What matters is steady air movement at room temperature.
This is the part many articles underplay. Absorbent paper helps, but absorbent paper plus airflow is what usually gets wet hiking shoes dry enough for morning use.
Step 4: Let gravity help
If water really pooled inside, angle the shoes so moisture can drain instead of sitting in the heel. A slight tilt works fine.
You don’t need to hang shoes upside down unless they’re drenched. Most of the time, opening them wide and keeping air moving does the job.
Step 5: Finish the morning check
Before you wear them, press a hand deep into the toe box and around the heel cup. Those spots stay damp longest.
If the upper feels dry but the insole area is still cool and damp, swap in dry backup insoles if you have them. That can rescue the day even if the shoe isn’t 100% dry.
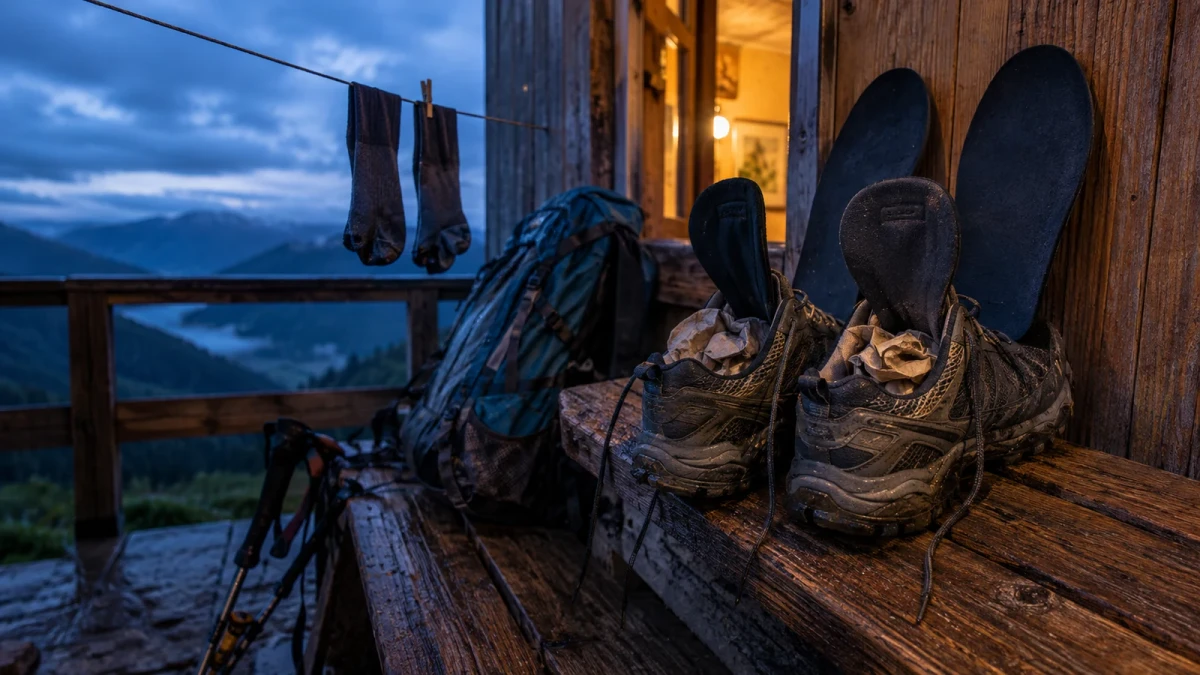
Priya used this exact setup in a small mountain hut after a stormy day in the Alps. She had no dryer, no stove access, and no extra shoes. She removed the insoles, used paper from her food bag as stuffing, and set both shoes near a window with cross-breeze all night. The next morning, the uppers were dry, the insoles were mostly dry, and she avoided another full day in soggy shoes.
Drying by Material: Mesh, Waterproof, and Leather
Different materials dry at different speeds. The safest method stays the same, but the expectations change.
Mesh trail runners
These are the easiest shoes to dry overnight. They breathe well, they release water faster, and they benefit most from fan airflow.
If your mesh shoes got wet from rain or a creek crossing, the paper-plus-fan method is often enough. Remove insoles, stuff lightly, aim a fan across them, and expect wearable dryness by morning in many indoor conditions.
This is one reason many experienced hikers prefer non-waterproof trail runners in warm or wet climates. They let water in faster, but they also let it out faster.
If you keep fighting slow-drying footwear, Trail Runners vs Hiking Boots explains the tradeoff in detail.
Waterproof hiking shoes
These are usually the hardest to dry overnight. Waterproof membranes help keep outside water out, but once water gets in from the collar, sweat buildup, or full submersion, it has fewer exit paths.
That doesn’t mean waterproof shoes are bad. It means you need to plan better. Remove insoles immediately, open the shoe as wide as possible, and change the stuffing at least once. If the shoes are fully soaked inside, “dry enough to hike in” is more realistic than “bone dry.”
This matches the broader care advice from ASICS and the hiking-specific guidance from REI and LOWA: air-dry, use absorbent paper, and avoid heat.
Leather hiking shoes
Leather needs patience. It can absolutely survive getting wet, but it hates aggressive drying.
Use the same overnight setup, but don’t chase speed with heat. Once the leather dries, check whether it feels stiff or thirsty. If it does, follow up later with the conditioner or treatment recommended by the manufacturer.
If your leather shoes are soaked through, they may not be fully dry by morning. The goal is safe progress, not forced speed.
Shoes with thick padding or winter collars
The collar and tongue trap more water than most hikers realize. If that padded ring still feels cool and damp in the morning, the rest of the shoe may also hold hidden moisture.
Press a dry towel into those zones before using paper. It buys you time.
Common Mistakes That Ruin Wet Hiking Shoes Overnight
The wrong shortcut can undo an otherwise great pair of shoes.
Don’t put them on a radiator, heater vent, fireplace edge, wood stove, or hot car floor. Heat ages adhesives and dries materials unevenly. That’s the fastest route to curling midsoles, cracked leather, and separated rands.
Don’t use a tumble dryer. Even if some casual sneakers survive it, hiking shoes are built with glued layers, protective overlays, and structured components that don’t love heat or impact.
Don’t leave wet insoles inside. This single mistake slows drying more than most people expect.
Don’t seal wet shoes in a bin, plastic bag, or trunk overnight. Hanwag specifically warns against damp, unventilated storage because it encourages odor, mildew, and shape problems.
Don’t rely on rice as your main solution. It’s messy, slow, and less practical than paper plus a fan. Silica can help in small amounts, but it still works best as an add-on, not as the primary overnight method.
If your shoes repeatedly smell sour after every wet hike, address that now instead of masking it — The Ultralight Clothing System covers the sock side of the problem.
Odor, Waterproofing, and “What If They’re Still Damp?”
Sometimes the real question isn’t how to dry wet hiking shoes overnight without damage. It’s how to make them wearable when they’re not fully dry by sunrise.
If the shoes are slightly damp but not soaked, start with dry socks and dry insoles. That changes comfort more than hikers expect. Merino or synthetic hiking socks also manage leftover moisture better than cotton.
If odor is building, wait until the shoes are mostly dry, then sprinkle in a little baking soda or use a shoe-safe deodorizing treatment. ASICS recommends drying first, then tackling residual moisture or odor. Don’t add powders to a shoe that’s still very wet.
If the outside treatment stopped beading water after the soaking, let the shoes dry fully and then reapply the appropriate water-repellent treatment for that material. Don’t treat them while they’re still wet unless the product instructions say otherwise.
Here’s the practical rule: if the heel cup, footbed, and toe box are only lightly damp, you can usually hike in them again with the right socks. If they still squish or chill your foot within minutes, they need more drying time.
If your current pair stays wet for two days after every rainy hike, stop blaming the weather alone. Compare your shoe type, sock system, and post-hike care routine before your next trip.
Build a Simple Drying Station Before the Next Storm
The easiest overnight win happens before the next wet hike, not after it.
Pick one spot at home with stable room temperature and decent airflow. Keep a fan nearby, along with paper towels or plain paper, a towel, spare socks, and if possible, an extra pair of insoles. That turns a late-night mess into a five-minute routine.
If you hike often in rain, snowmelt, or shoulder-season mud, consider a gentle boot or shoe dryer designed for low heat or forced air only. Read the shoe maker’s care guidance first. The best models help, but only when they stay in the safe temperature range.
You should also think about prevention. Gaiters, quicker-draining shoes, and better creek-crossing habits reduce how soaked your footwear gets in the first place.
Before your next wet-weather trip, build your drying station tonight, not after the forecast turns ugly. One fan and a stack of paper are a lot cheaper than replacing dead hiking shoes.
FAQ
How long does it take to dry wet hiking shoes overnight?
Lightly wet mesh hiking shoes can often dry enough overnight in 8 to 12 hours with stuffing and a fan. Waterproof or leather hiking shoes usually take longer. If they were soaked through, expect “wearable by morning” rather than perfectly dry, especially in humid rooms.
What’s the fastest safe way to dry wet hiking shoes by morning?
The fastest safe method is to remove insoles and laces, blot surface water, loosely stuff the shoes with absorbent paper, and place them in front of a fan at room temperature. Change the paper once if it gets saturated. That combination speeds drying without harming adhesives or uppers.
Can I dry hiking shoes with a hair dryer on low?
You can use cool air in a pinch, but it’s not the best overnight method. A hair dryer still tends to focus airflow in one spot, and many people accidentally drift into warm settings. A regular fan is safer, more even, and better for long drying sessions.
Why do waterproof hiking shoes dry so slowly?
Waterproof shoes dry slowly because the same membrane that blocks outside water also limits how quickly trapped inside moisture escapes. Once water gets in through the collar or from sweat buildup, it has fewer paths out. That’s why waterproof models often need more airflow and more time.
Should I put newspaper inside wet hiking shoes?
Yes, plain newsprint or absorbent paper works well because it pulls moisture from the inside while helping the shoe hold its shape. Just don’t pack it too tightly, and replace it when it gets damp. Combined with fan airflow, it’s one of the safest overnight methods.
Make Overnight Drying a System, Not a Scramble
Drying hiking shoes overnight isn’t about finding a clever shortcut. It’s about using the right sequence: open the shoe, remove the insoles, blot the water, stuff the inside, and keep air moving all night.
If you remember only one thing, remember this: don’t use heat. Heat feels fast, but it’s what causes the damage hikers complain about later, from cracked leather to loose glue to warped shape. The safer method is also the more reliable one.
The next time you come home with soaked footwear, don’t leave your result up to chance. Set up a simple drying station, give your shoes airflow instead of heat, and check the toe box and heel before you lace up again. If wet-weather hiking is part of your season, build your overnight drying kit today and pair it with a sock and shoe strategy that dries as well as it hikes.
Next Steps
- Read Trail Runners vs Hiking Boots to understand why some shoes dry overnight and others don’t.
- Check The Ultralight Clothing System for the sock system that decides how wet your feet get.
- Review Ultralight Rain Gear for Backpacking to keep less water reaching your feet in the first place.
Sources
- REI — Caring for Hiking Boots — cleaning and drying without heat
- LOWA — Care Tips — manufacturer drying guidance for leather and fabric
- Hanwag — How do I clean my boots and shoes? — why damp, unventilated storage damages footwear
- ASICS — How to Clean Running Shoes — drying order for mesh uppers and odor control
Einen Kommentar hinterlassen