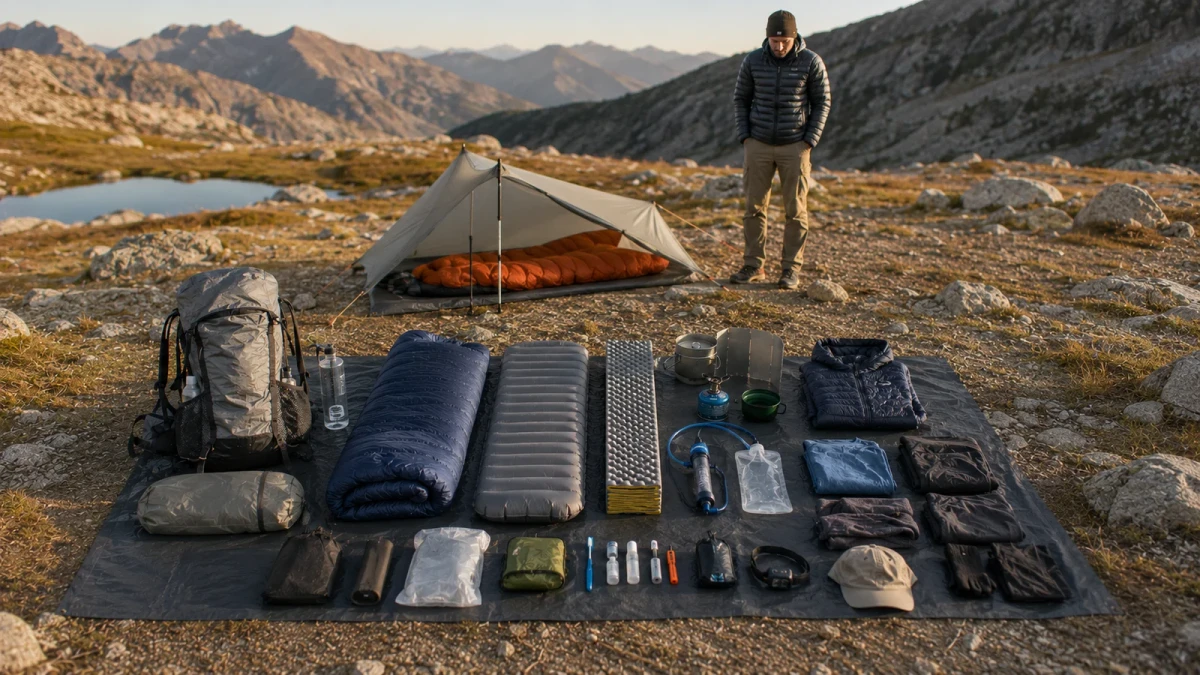
Part 46 of the HikeLab Ultimate Ultralight Guide Series.
Most hikers don’t lose time on the trail because they forgot a titanium spoon. They lose it because they’re hauling four to six extra pounds they never needed in the first place. That’s why ultralight hiking gear matters.
Ultralight hiking gear is not about turning every trip into an extreme survival test. It’s about making climbing easier, moving faster, and ending the day with enough energy to enjoy camp.
If you’ve ever finished a hike with sore shoulders, tired knees, and a pack full of “just in case” items, you already know the problem. The good news is that going lighter does not mean getting reckless. This guide agrees with the frustration, promises a practical fix, and previews the smartest path forward: cut the biggest weight first, match your kit to your trip, and keep the items that protect warmth, weather safety, hydration, and navigation. By the end, you’ll know what counts as ultralight, what to upgrade first, and how to build a lighter setup that still works in the real world.
Key Takeaways
- Ultralight hiking gear works best when you cut the heaviest items first, not when you obsess over tiny accessories.
- Base weight matters, but trip type matters just as much because a day hike, weekend overnight, and thru-hike need different kits.
- The best ultralight hiking gear keeps the essentials strong: shelter, sleep warmth, water treatment, navigation, and weather protection.
- Most hikers get the best results from a gradual upgrade path, not a full gear overhaul in one shopping session.
What Counts as Ultralight Hiking Gear?
Ultralight hiking gear usually means a setup designed to keep base weight as low as practical while still protecting comfort and safety. For overnight trips, “ultralight” often refers to a base weight under 10 pounds. For most hikers, though, the real win is not chasing a magic number. It’s cutting the biggest, least useful pounds first.
Here’s a simple way to think about it:
- Traditional overnight kit: often 18 to 30+ pounds of base weight
- Lightweight kit: usually around 10 to 18 pounds of base weight
- Ultralight backpacking gear: often under 10 pounds of base weight
That definition matters because searchers use this topic broadly. Some want an ultralight gear list for day hikes. Others want a full ultralight backpacking checklist for weekends or long trails.
The smart answer is not one rigid setup. It’s a lighter kit built for your mileage, weather, and experience.
This is also where the “light, not stupid light” rule comes in. Good ultralight hiking gear is defined by function, not by suffering. Do not cut insulation, rain protection, water treatment, navigation, or emergency basics just to hit a number. The National Park Service Ten Essentials still applies even if your pack looks cleaner and smaller.
Start With Base Weight, Pack Weight, and Trip Type
Before you buy anything, weigh what you already carry. That one step will teach you more than hours of gear scrolling. Base weight means everything in your pack except food, water, and fuel. Pack weight is the total load you actually carry at the trailhead.
Trip type changes what “smart light” looks like:
- Day hike: focus on water, weather layers, snacks, navigation, and emergency basics
- Weekend overnight: add shelter, sleep system, dinner, breakfast, and a simple kitchen
- Thru-hike or long section: focus on repeat comfort, durability, easy resupply, and consistent daily efficiency
Maya learned this on a rainy weekend in North Carolina. She copied a thru-hiker’s ultralight backpacking gear list for a short overnight, left out a warmer layer, and spent camp wrapped in her quilt before sunset. On her next trip, she carried six extra ounces of insulation, slept well, and still cut more than three pounds from her original kit by removing duplicate clothing and bulky camp extras.
That’s the key point. Your lightest useful kit depends on your trip, not someone else’s spreadsheet. The best ultralight hiking gear always starts with trip type, not trend chasing. If you want a cleaner starting point, build a simple ultralight backpacking checklist with three columns: must carry, nice to have, and dead weight.
Weigh your pack tonight and identify your five heaviest items. Most of your next improvements will come from that short list.
Cut the Big Three First: Pack, Shelter, and Sleep System
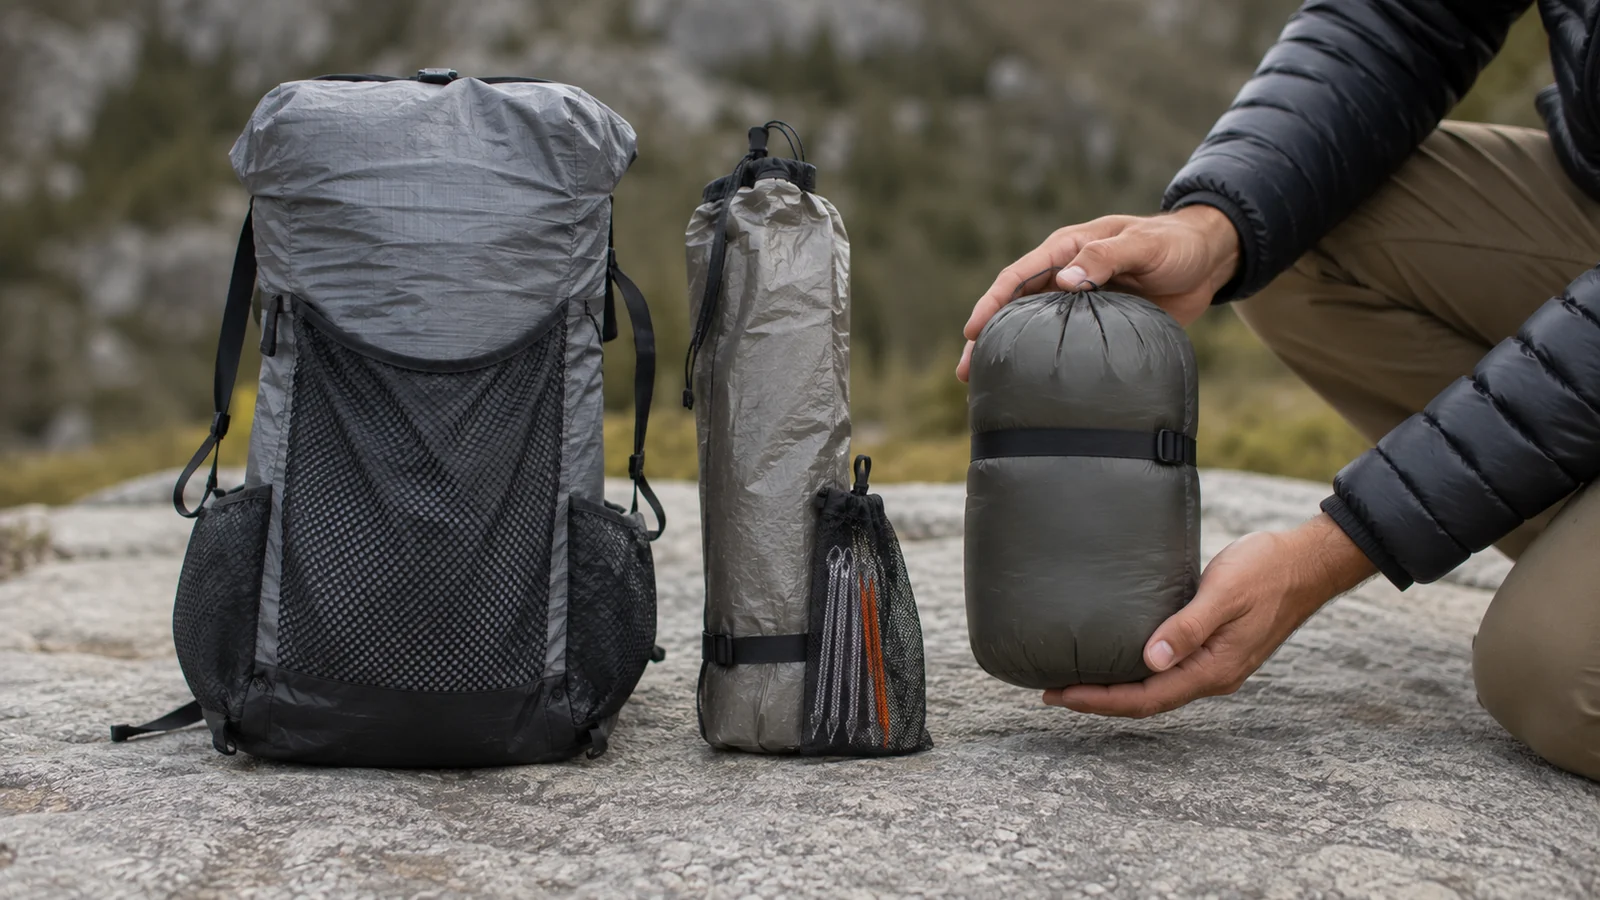
If you want the fastest drop in pack weight, start with the Big Three. That means your backpack, shelter, and sleep system. These items dominate most heavy setups, so they offer the biggest gains.
Your pack should match your current kit, not the giant load you used to carry. Many hikers do best with a framed pack in the 40L to 60L range until their gear is truly compact. A frameless pack can be excellent later, but it usually works best once your total load is already low and your packing style is dialed in.
Shelter is where many hikers save a full pound or more in one move. A lighter tent, trekking-pole shelter, or shaped tarp can change the whole feel of a trip. But ease of pitching matters.
If a shelter is hard to set up when you’re cold, tired, or dealing with wind, it may not be the best ultralight hiking gear for you yet. REI’s ultralight backpacking advice gets this right: go lighter, but stay realistic.
Sleep systems deserve the same honesty. Cutting too much warmth is one of the fastest ways to make a light kit feel worse. A quilt can save serious weight, but only if it matches your sleep style and expected temperatures.
Your sleeping pad matters too. A lighter pad that leaves you cold at 2 a.m. is not an upgrade.
Josh, a new backpacker from Oregon, replaced a bulky old tent before anything else and saved nearly two pounds. That helped, but the bigger change came later when he swapped a heavy synthetic sleeping bag for a properly rated quilt and stopped carrying a second camp outfit. His base weight dropped from about 17 pounds to just under 11, and he finished his next three-day trip without the usual knee pain on descents.
When you compare gear, ask three questions:
- How much weight does this cut?
- Does it still fit my weather and comfort needs?
- Will I trust it at the end of a hard day?
That filter will get you farther than hype.
Choose Lighter Footwear and Clothing Without Cutting the Wrong Things
Once the Big Three are under control, clothing and footwear become the easiest place to remove hidden pounds. Most hikers overpack layers, not because they need them, but because they fear being caught unprepared.
A smart clothing system is simple. You need one hiking outfit, one insulation layer, one rain layer, and dry sleep clothes or spare socks when conditions justify them. You usually do not need extra shirts, backup pants, or a second “camp outfit” for a normal overnight.
Footwear deserves a fair look too. Many hikers move better in trail runners because they dry faster and feel less tiring over long miles. Boots still make sense for some terrain and some bodies, but heavier is not automatically safer. The best ultralight hiking gear for beginners often starts with lighter shoes and fewer packed clothing duplicates, not exotic materials.
Elena, a weekend hiker in Colorado, used to carry heavy boots, thick spare layers, and insulated camp shoes on every shoulder-season trip. After a careful shakeout, she switched to trail runners, trimmed her packed clothing to one warm layer and one shell, and dropped more than two pounds without touching her shelter. Her result was simple: she climbed faster and stopped dreading long switchbacks.
Do not cut the wrong things, though. Keep a real rain shell when forecasts are unstable. Keep enough insulation for camp and sleep.
Keep dry socks if cold, wet conditions make them worth the ounces. Ultralight hiking gear for beginners should feel more efficient, not more stressful.
Build a Lean Kitchen, Water, Power, and Safety Kit
This is where small items quietly add up. The goal is not to strip your kit bare. The goal is to stop carrying five “tiny” things that together weigh more than a better shelter.
For kitchen gear, go basic. If you like hot meals, a small pot, compact stove, and simple spoon are enough for most trips. If you prefer cold soak or ready-to-eat food, your kitchen can get even lighter. What matters is choosing a system you’ll actually use.
Water is often the most misunderstood weight on trail. One liter weighs about 2.2 pounds, so bad water planning can erase all the money you spent on lighter gear. Study your route, know where refill points are, and adjust your carry to weather and terrain. Reliable treatment still matters, so keep a filter, chemical backup, or another proven method.
Power should be trip-specific. A short weekend may only require a small battery or none at all if your phone stays mostly in airplane mode. A longer trip with navigation, photos, and GPS tracking may justify more capacity. Match the power bank to real use, not fear.
Safety basics stay in the pack. That includes navigation, first aid, a light source, weather protection, and emergency planning. A reliable ultralight hiking gear system still includes those basics every time. Leave No Trace’s seven principles are worth reviewing because better habits often support lighter systems too.
Empty your ditty bag, first-aid kit, and electronics pouch before your next trip. Those categories often hide the easiest free weight savings.
How to Upgrade to Ultralight Hiking Gear on a Budget
Many people assume ultralight means expensive. It can be, but it does not have to be. The cheapest smart path is usually not buying the lightest item in every category. It’s replacing the worst weight offenders in the right order.
Start with savings per dollar. A lighter shelter that saves 20 ounces is usually a better value than a premium accessory that saves one ounce. That’s why a budget-focused upgrade path works so well:
- Remove dead weight and duplicates first
- Upgrade the heaviest item in your Big Three
- Clean up clothing, water carry, and small accessories
- Test on a short trip before buying the next major item
Used gear can help a lot here. Packs, shelters, trekking poles, and some insulation pieces often offer great value secondhand if they’re still in good shape. Outlet sections can help too, especially if you are flexible on color and last year’s model. Real retailers with useful sale inventory include REI Outlet, Backcountry, and Decathlon.
This is also where many hikers make their first strong ultralight gear list. Keep it simple. Write the item, current weight, target weight, and estimated cost.
That one page turns “I should go lighter” into a real plan. Affordable ultralight hiking gear starts with ruthless prioritization, not endless browsing.
If you’re building ultralight hiking gear for beginners, do not chase premium fabrics before your system makes sense. Fit, warmth, and weather protection matter more than owning the newest material. A solid, lighter mid-range kit beats a fragile or uncomfortable “ultralight” setup every time.
If you only make one purchase this season, make it the upgrade that removes the most weight from your pack for the least money.
Sample Ultralight Hiking Gear Setups for Day Hikes, Weekend Trips, and Thru-Hikes
The right ultralight hiking gear changes with the trip. Here’s a practical way to frame it.
For a day hike, your setup should stay lean and safety-focused. Carry water, snacks, a shell, sun protection, navigation, a small first-aid kit, and a light emergency layer. This is where many hikers realize they’ve been overpacking “just in case” luxuries instead of useful safety items.
For a weekend overnight, your ultralight backpacking checklist should center on the Big Three, a simple food plan, and a lean water setup. This is the sweet spot for most hikers because you can feel the benefits of lighter gear without the complexity of a long resupply-based trip.
For a thru-hike or long section, efficiency matters even more. You want gear that is light, repeatable, easy to pack, and durable enough for daily use. That often means a dialed-in shelter pitch, a sleep system you trust, and a kitchen or food strategy that feels almost automatic.
A clean ultralight gear list might look different in each case, but the principle stays the same: carry what supports the actual trip and remove what only supports anxiety. Sample ultralight hiking gear setups should feel like templates, not rules. If a piece of gear does not help you hike, sleep, stay warm, stay dry, navigate, or recover, it should have to defend its place.
That’s why the best ultralight hiking gear rarely comes from copying one influencer’s exact kit. It comes from repeated testing. Your local weather, your body, your comfort level, and your hiking style all matter.
Common Ultralight Mistakes That Make a Light Kit Worse
The biggest mistake is going too extreme too fast. A frameless pack, tarp-only shelter, or tiny pad may work later, but they can create avoidable friction early on. That friction often gets blamed on ultralight hiking itself when the real problem is poor sequencing.
The second mistake is cutting warmth before cutting junk. A hiker who drops a warm layer but keeps three luxury extras is doing the opposite of smart ultralight.
The third mistake is buying small upgrades before fixing the heavy core items. Lightweight accessories look fun, but they rarely change how your pack feels the way a better shelter, sleep system, or pack will.
The fourth mistake is ignoring skill. Better route planning, campsite selection, water planning, and weather judgment let you carry less with more confidence. That’s what separates a thoughtful ultralight backpacking gear system from a random collection of expensive items.
If your kit feels lighter but your trips feel worse, stop and reassess. Good ultralight hiking gear should improve movement, recovery, and confidence. If it does not, the answer is usually not “go even lighter.” It’s “go smarter.”
FAQ
How do I start building ultralight hiking gear if I already own regular backpacking gear?
Start by weighing everything you already own. Remove duplicate clothing, heavy luxury items, and backup gear you rarely use. Then upgrade the heaviest item in your Big Three first. That approach is cheaper and usually gives the fastest payoff.
What is considered ultralight hiking gear for beginners?
For overnight trips, ultralight usually means a base weight under 10 pounds, but beginners do not need to hit that number immediately. A safer goal is building a lighter setup that keeps shelter, sleep warmth, water treatment, and navigation intact. For many hikers, that means starting in the 10- to 15-pound range and refining from there.
Why does ultralight hiking gear make such a big difference on trail?
Less weight affects almost every part of the hiking day. Climbs feel easier, downhills feel less punishing, and you usually finish with more energy. A lighter pack also makes it easier to keep moving efficiently and enjoy camp once you arrive.
Which upgrades save the most weight in an ultralight gear list?
The biggest savings usually come from the pack, shelter, and sleep system. After that, lighter footwear, fewer packed clothes, better water planning, and a simpler kitchen often give the next best gains. Tiny accessories should come later.
When should I replace heavy gear instead of just packing less?
Replace heavy gear when the item is truly oversized for your needs or when a lighter version cuts meaningful weight without creating new problems. If your shelter is bulky, your pack is overbuilt, or your sleep system is outdated, those upgrades often matter more than trimming another ounce from toiletries.
Build the Kit That Makes Your Next Trip Better
Ultralight hiking gear is not about winning a gear contest. It’s about carrying less so the trail feels better from the first climb to the last mile back to the car. When you focus on the biggest categories first, match your setup to your trip, and protect the essentials that keep you warm, dry, hydrated, and oriented, ultralight hiking gear becomes practical instead of intimidating.
Your next move does not need to be dramatic. Weigh your current kit, identify the heaviest items, and cut or replace one thing that will actually change how your pack carries. Then test the result on a short trip, take notes on what you used, and refine again. That simple process is how most hikers find the best ultralight hiking gear for their real conditions, not someone else’s fantasy setup.
If you use this guide as your filter, you’ll avoid the common mistakes that make light kits feel worse instead of better. Start with one action this week: build your checklist, trim your dead weight, or upgrade your heaviest core item. A lighter pack won’t just improve your numbers. It will improve your pace, your recovery, and how much you enjoy every mile.
Next Steps
- Read The Ultimate Base Weight Guide to put a number on your current kit.
- Check The Beginner Ultralight Gear List for a starting kit you can copy.
- Review How to Reduce Backpacking Pack Weight for the audit that finds your easiest savings.
Sources
- REI — Ultralight Backpacking Basics — category-by-category weight targets
- National Park Service — Ten Essentials — the safety floor under any light kit
- Leave No Trace — Seven Principles — habits that let simpler gear work
- National Park Service — Hypothermia Safety — the cold-weather limits of cutting insulation
Einen Kommentar hinterlassen