Part 44 of the HikeLab Ultimate Ultralight Guide Series.
One liter of water weighs 2.2 pounds, which is why water treatment can make or break an ultralight kit faster than almost any other gear choice. The best approach to water filtration for ultralight backpacking is not just buying the lightest cartridge on a spec sheet. It is building an ultralight backpacking water filter setup that lets you carry less, refill faster, and avoid ugly trail problems like clogged membranes, frozen filters, and bottles that do not fit your system.
If you have ever stood over a shallow creek, a silty cattle tank, or a clear alpine stream and wondered what treatment method actually makes sense, you are in the right place. This guide will help you match the right setup to the route, understand the real difference between a filter and a purifier, compare the big ultralight options, and avoid the small mistakes that turn a quick refill into a twenty-minute chore.
Key Takeaways
- The best ultralight setup is the one that helps you carry less water weight with less hassle, not simply the one with the lowest listed ounces.
- Most U. S. hikers do well with a squeeze filter plus backup chlorine dioxide tablets, but purifier-level protection matters more where virus risk is realistic.
- Route conditions should drive your decision: clear alpine water, silty desert sources, freezing nights, and high-use corridors all punish different systems.
- Thread compatibility, field cleaning, and freeze protection matter just as much as flow rate when you choose an ultralight backpacking water filter.
Why Water Treatment Matters More in Ultralight Backpacking
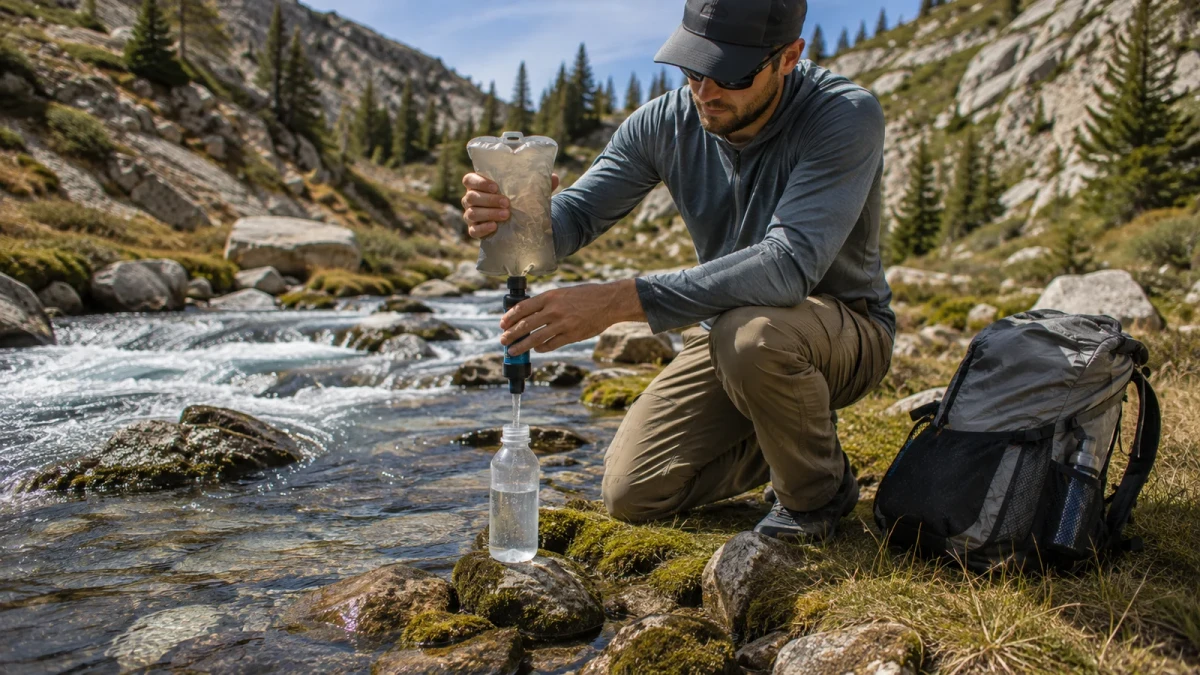
Ultralight hiking is about removing wasted effort, not just trimming grams. Water is usually the heaviest thing in your pack, so the smartest system is the one that lets you leave each source with exactly what you need. A good ultralight backpacking water filter helps you refill fast enough that you stop carrying panic water between reliable sources.
That matters because unsafe water is not always obvious. The CDC’s backcountry water guidance warns that water can look clean and still contain harmful germs. Clear water is encouraging, but it is not proof.
The real ultralight win is low friction. If your setup is slow, awkward, or constantly leaking around bottle threads, you start delaying refills or carrying extra liters just to avoid the next stop. Both choices cost energy and pack weight.
Water Filter vs Purifier vs Chemical Treatment: What Should You Carry?
Here is the short answer. A backpacking filter is usually meant to remove protozoa and bacteria. A purifier is designed to deal with viruses too. Chemical treatment is the lightest backup, but it is slower and depends more on water clarity, temperature, and wait time.
The CDC Yellow Book explains the key size difference: portable microfilters are effective for bacteria and protozoa, but they do not reliably remove enteric viruses. That is why the filter-versus-purifier question matters more on international trips, heavily impacted waterways, and routes where human-source contamination is plausible.
| Method | What it removes best | Best use case | Main tradeoff |
|---|---|---|---|
| Filter | Protozoa, bacteria, sediment | Most backpacking in the U. S. and Canada | Usually does not cover viruses |
| Purifier | Protozoa, bacteria, viruses | International travel, poor sanitation, high human impact | More weight, cost, or complexity |
| Chemical treatment | Viruses and bacteria, with effectiveness depending on product and contact time | Backup treatment, emergency redundancy, minimalist backup kits | Slower and less ideal in cloudy water |
For many hikers, the sweet spot is simple: use an ultralight backpacking water filter as your primary system and carry chlorine dioxide tablets as backup. The CDC also notes that cloudy water should be clarified or filtered before chemical disinfection works well, which is another reason filters still do most of the daily work on trail.
If your water kit has only one failure point, fix that before your next trip. Backup tablets weigh very little and solve a surprising number of bad-luck scenarios.
How to Choose an Ultralight Backpacking Water Filter by Route Conditions
The right ultralight backpacking water filter depends more on your route than on the internet’s favorite brand. Start with water quality, temperature, trip length, and how often you expect to refill. Those four factors decide more than lab specs do.
If your route has clear alpine flow, speed matters. A quick squeeze system or flask-based setup works well because sediment is low and you can refill fast. If your route is full of silty potholes, desert guzzlers, or livestock tanks, easy cleaning and wide-mouth collection matter much more.
Cold weather changes everything. Hollow-fiber filters can be damaged if they freeze after use. Sawyer’s help center says a filter that has frozen may be compromised, while Platypus makes a point of the QuickDraw integrity check for exactly this reason.
Virus risk is the next branch in the decision tree. On many North American backcountry routes, bacteria and protozoa are the main everyday concern. If you are traveling internationally or hiking where sanitation is poor, a purifier or a filter-plus-chemical plan is the smarter call.
Nina learned that lesson on a spring trip in southern Utah. She started with a fast soft-flask setup that felt perfect on day one, then hit two muddy cattle tanks and watched the flow slow to a trickle. On her next trip, she added a wider dirty-water bag, prefiltered through a bandana, and kept chlorine dioxide tablets in her repair pouch. She spent less time fighting her kit and stopped carrying an extra liter “just in case.”
Group size matters too. Solo hikers often care most about quick source stops and front-of-pack access. Pairs and small groups usually benefit from larger reservoirs, easier gravity options, and a cleaner split between dirty-side and clean-side gear.
Sawyer Squeeze vs Platypus QuickDraw vs Katadyn BeFree vs LifeStraw Peak Solo
This is the comparison most hikers search first, but the better question is not “Which filter wins?” It is “Which workflow fits the way I actually hike?” As of April 19, 2026, these are the standout ultralight options most shoppers compare.
| Filter | Official listed weight | Standout strength | Best fit |
|---|---|---|---|
| Sawyer Squeeze | Filter weighs 3 oz on the product page | Proven 28 mm compatibility and long claimed lifespan | Thru-hikers who want a standard setup |
| Platypus QuickDraw | 2.4 oz minimum weight | Fast flow, easy cleaning, integrity check | Hikers who want speed and confidence after a freeze scare |
| Katadyn BeFree 0.6L | 59 g / 2.1 oz system | Excellent soft-flask workflow with clear water | Fastpackers and runners using 42 mm flasks |
| LifeStraw Peak Solo | 1.7 oz | Very low weight and simple bottle use | Minimalists who still want squeeze-style flexibility |
Sawyer Squeeze vs Platypus QuickDraw is still the main head-to-head battle because both live comfortably in the 28 mm bottle world. Sawyer remains the safe default for long trails because it fits common bottles, accepts aggressive backflushing, and has a huge installed base of trail knowledge behind it. QuickDraw feels more refined in daily use, and its integrity check is a real advantage if cold nights are part of your season.
Katadyn BeFree vs Sawyer Squeeze usually comes down to ecosystem and sediment tolerance. The BeFree feels wonderfully fast and convenient with clean water, but it lives in the 42 mm world and many hikers find it less forgiving in dirty water. Sawyer is not as sleek in hand, yet it adapts more easily to common bottle-and-bag systems.
LifeStraw Peak Solo is lighter than the others and worth more attention than it gets. It gives you a strong weight-to-performance ratio, but the broader long-trail ecosystem around it is smaller than the one around Sawyer or QuickDraw.
Malik switched from a bulky pump to a Sawyer Squeeze before an Arizona Trail section and cut both pack weight and refill time. He tested a friend’s QuickDraw at camp and liked the smoother squeeze, but he stayed with Sawyer because every bottle in his kit already matched 28 mm threads. That is often the deciding factor in real life: the best ultralight backpacking water filter is the one that reduces system friction, not the one that wins a spreadsheet.
Before you buy a new filter, lay out every bottle, cap, and reservoir you already own. If a new filter forces adapters, replacement flasks, or awkward decanting, the lighter number on the box may not save time or weight on trail.
Best Ultralight Backpacking Water Filter Setups for 4 Backpacker Types
You do not just choose a filter. You choose a full system. These four setups cover most real-world hikers better than a giant “best of” list.
For the thru-hiker, the default answer is still a Sawyer Squeeze or Platypus QuickDraw with one shoulder-strap bottle, one spare bottle in the pack, and a 2-liter dirty reservoir for dry stretches. This setup is easy to replace in trail towns and easy to repair with common parts.
For the weekend fastpacker, a Katadyn BeFree-style soft-flask setup shines on routes with frequent clean sources. You can scoop, drink, squeeze into another bottle, and keep moving without stopping long enough to lose momentum.
For the budget beginner, a basic squeeze filter plus standard 28 mm bottles is hard to beat. It keeps costs down, avoids weird adapters, and teaches good clean-side versus dirty-side habits from the start.
For the shoulder-season hiker, freeze management should shape the whole choice. Sleep with the wet filter inside a bag in your quilt, keep it close to your body on cold mornings, and carry chemical backup in case you suspect freeze damage. A slightly heavier but simpler routine is often the smarter ultralight move when nights flirt with freezing.
Lena found that out during an October overnight in Colorado. She left her wet filter in the vestibule because the forecast looked “almost warm enough” and woke up to ice on the bottle pocket. She did finish the trip by switching to backup tablets, but she spent the rest of the day second-guessing every sip. On the next trip, she slept with the filter and carried the same tablets on purpose instead of as an afterthought.
Build the Rest of the System: Bottles, Flasks, Bladders, and Dirty Bags
Compatibility is where many good filters become annoying systems. Sawyer and QuickDraw work well with common 28 mm narrow-mouth bottles. That is a huge reason they dominate thru-hiking setups.
The BeFree sits in a different lane. HydraPak’s compatibility guide explains that many Flux bottles, Seekers, and running flasks use 42 mm threads that match the Katadyn BeFree. That can be excellent if you want wide-mouth collection and front-mounted soft flasks, but it is not automatically interchangeable with a 28 mm squeeze filter.
CNOC makes that choice clearer because it sells both 28 mm and 42 mm collection systems. The mistake is assuming all dirty-water bags are basically the same. They are not.
Riley found that out on the John Muir Trail when he packed a 42 mm bag with a 28 mm filter. He made it work by pouring dirty water into a second bottle, but every refill became a sloppy, two-step mess. On his next trip, he matched the threads, labeled one vessel dirty, and cut enough source time to make bigger afternoon miles realistic.
Keep the system simple:
- One dirty-water container that is easy to fill
- One primary clean bottle that you drink from all day
- One spare bottle or flask for dry stretches
- One backup treatment method
How to Keep Your Ultralight Backpacking Water Filter Fast and Safe
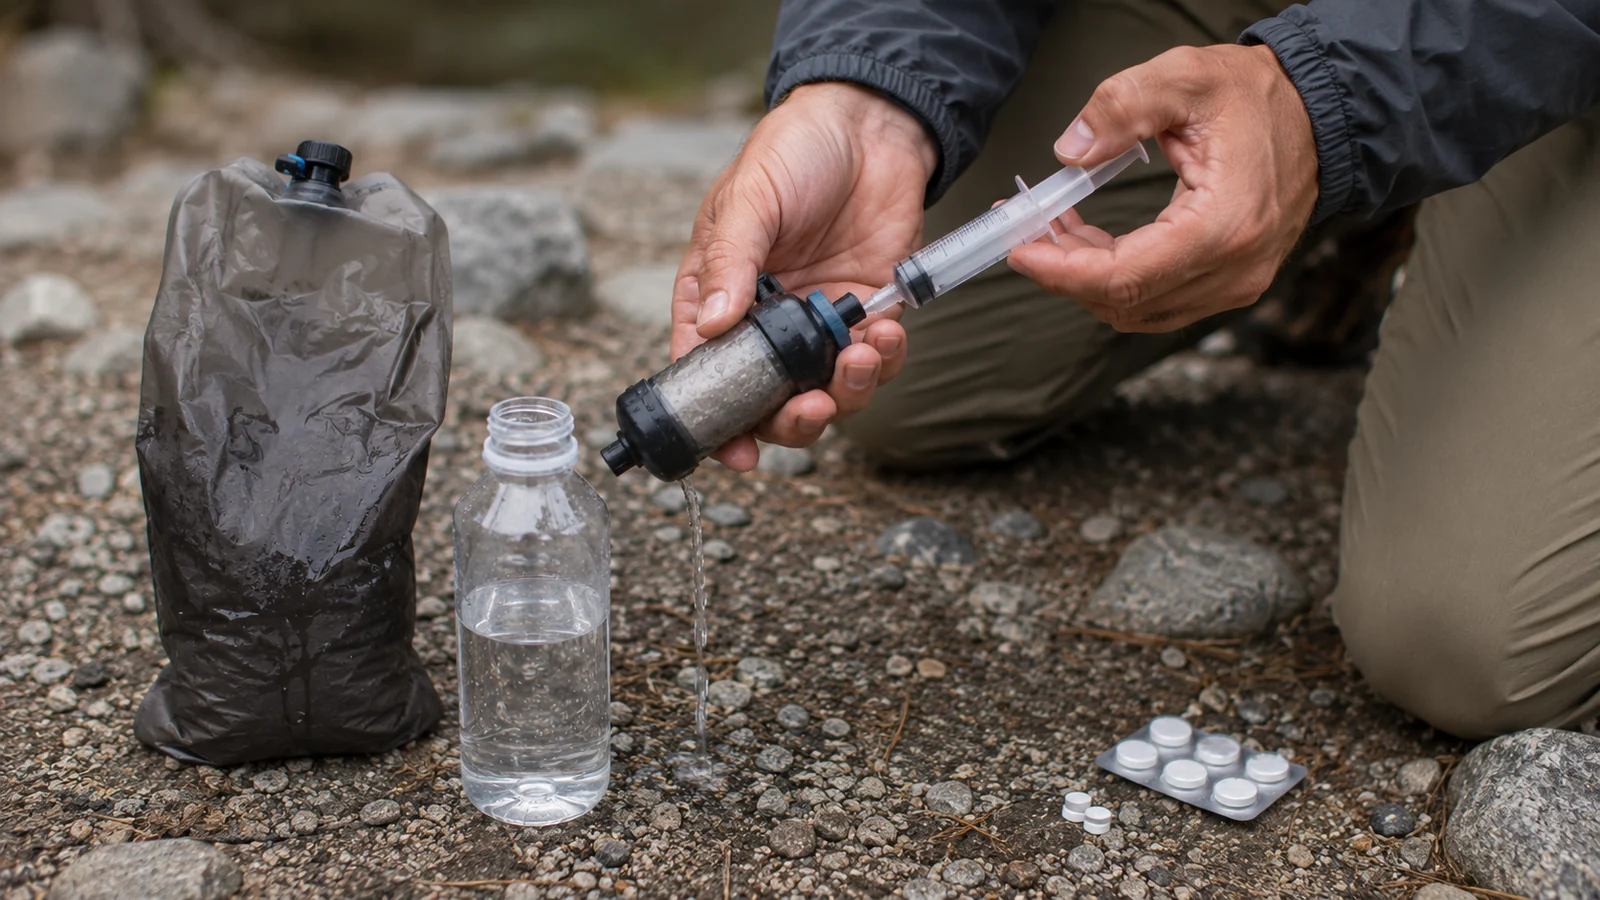
Flow rate on day one means very little. Flow rate on day six is what matters. The best ultralight backpacking water filter stays fast because you build maintenance into your trail routine.
Start with sediment. If water is cloudy, let it settle when possible and prefilter through a bandana, buff, or coffee filter before it hits the cartridge. That small step often saves more time than any upgrade to a newer filter body.
Then clean early instead of late. Sawyer recommends backflushing when flow drops. Platypus says the QuickDraw can be shake-cleaned and backflushed, and Katadyn built the BeFree around a simple swish-clean habit.
Freeze protection is non-negotiable. Once a hollow-fiber filter has frozen while wet, you may not be able to trust it. QuickDraw’s integrity test helps, but prevention is still the better strategy.
Clean-side discipline matters just as much. Do not let a dirty bottle rim touch your clean bottle mouth. Do not toss the clean cap in sand and tell yourself it is probably fine. Many water-treatment failures come from sloppy handling, not from a catastrophic filter defect.
Add a thirty-second water routine to your trip plan: settle silty water, prefilter if needed, protect the filter from freezing, and separate dirty from clean every single time. Consistency beats gear hype here.
Common Water Treatment Mistakes That Cost Ultralight Hikers Time or Safety
The first mistake is chasing the lightest possible number and ignoring the route. A tiny direct-drink setup looks brilliant on a spreadsheet until you hit algae, mud, or livestock water and spend ten minutes fighting half a liter through the membrane.
The second mistake is trusting clear water too much. The CDC is direct on this point: appearance is not a safety test. Clear alpine runoff can still be contaminated below camps, trail junctions, grazing areas, or popular lakes.
The third mistake is skipping backup treatment. If your filter cracks, freezes, or clogs beyond reason, “I’ll just be careful” is not a real plan. Tablets are cheap insurance.
The fourth mistake is ignoring human-source contamination. Most squeeze filters are not true purifiers, which means virus risk can still matter in the wrong setting. That is where the backpacking water purifier vs filter question stops being academic.
The fifth mistake is building a mismatched system. Wrong threads, fragile flasks, no field-cleaning plan, and no clear dirty-side versus clean-side workflow all create friction. Friction makes people cut corners, and cut corners are where bad water decisions start.
FAQ
How do I choose the best ultralight backpacking water filter?
Start with the route. Look at source clarity, likely sediment, nighttime temperatures, refill frequency, and whether virus risk is realistic. Then choose the system that gives you the least hassle for those conditions, not the one with the loudest marketing.
What is the difference between a backpacking water purifier and filter?
A filter is usually meant to remove bacteria and protozoa. A purifier is designed to handle viruses too. That difference matters most on international trips, near poor sanitation, or anywhere human contamination is a serious concern.
Why do so many hikers carry chemical water treatment for backpacking?
Because it solves failure points that filters do not. Tablets give you backup if the filter freezes, clogs, cracks, or gets lost, and they can help address virus concerns when used correctly.
Which is better: Sawyer Squeeze vs Platypus QuickDraw?
Sawyer Squeeze is the safer default if you want maximum compatibility, trail-proven reliability, and an easy-to-find replacement. Platypus QuickDraw is better if you care more about squeeze feel, fast flow, and having an integrity check after a freeze scare.
When should I use chemical water treatment instead of a filter?
Use it as backup on every trip. Use it as your main method when your filter is compromised, when you need the lightest possible emergency option, or when you need virus coverage and are willing to wait for full treatment time.
Build a Water System You Can Trust When You Are Tired
Water filtration for ultralight backpacking is really a system decision, not a product decision. The right setup lets you carry less water, refill without drama, and keep moving with confidence whether your route serves up clear runoff, silty pools, or freezing mornings. The best ultralight backpacking water filter is rarely the one with the flashiest spec sheet. It is the one that matches your route, your bottles, and your habits with the fewest failure points.
That means your next move should be practical. Map the water sources on your next trip, think honestly about sediment and overnight temperatures, and check every bottle thread in your kit before you leave home. Add backup chlorine dioxide tablets, then run one full refill practice at home so you know the workflow works when you are tired, cold, or rushing daylight.
That small prep session does more for trail confidence than another hour of gear browsing. Choose the setup that fits your route, trust the routine, and keep refining the system after each trip. When your water plan is simple and reliable, you hike lighter, move faster, and make better decisions all day.
Next Steps
- Read Sawyer Squeeze vs Katadyn BeFree for the head-to-head on the two most common filters.
- Check How to Reduce Backpacking Pack Weight to see how water planning changes your carried load.
- Review The 3-Season Central Europe Gear List for a water setup in a specific climate.
Sources
- CDC — Water Treatment for Hiking, Camping, and Travel — what filters and chemicals actually remove
- CDC Yellow Book — Water Disinfection for Travelers — virus risk and contact times
- Sawyer — Squeeze Filter System — manufacturer flow, cleaning, and freeze guidance
- HydraPak — Filter Compatibility — thread and bottle compatibility
Leave a Comment