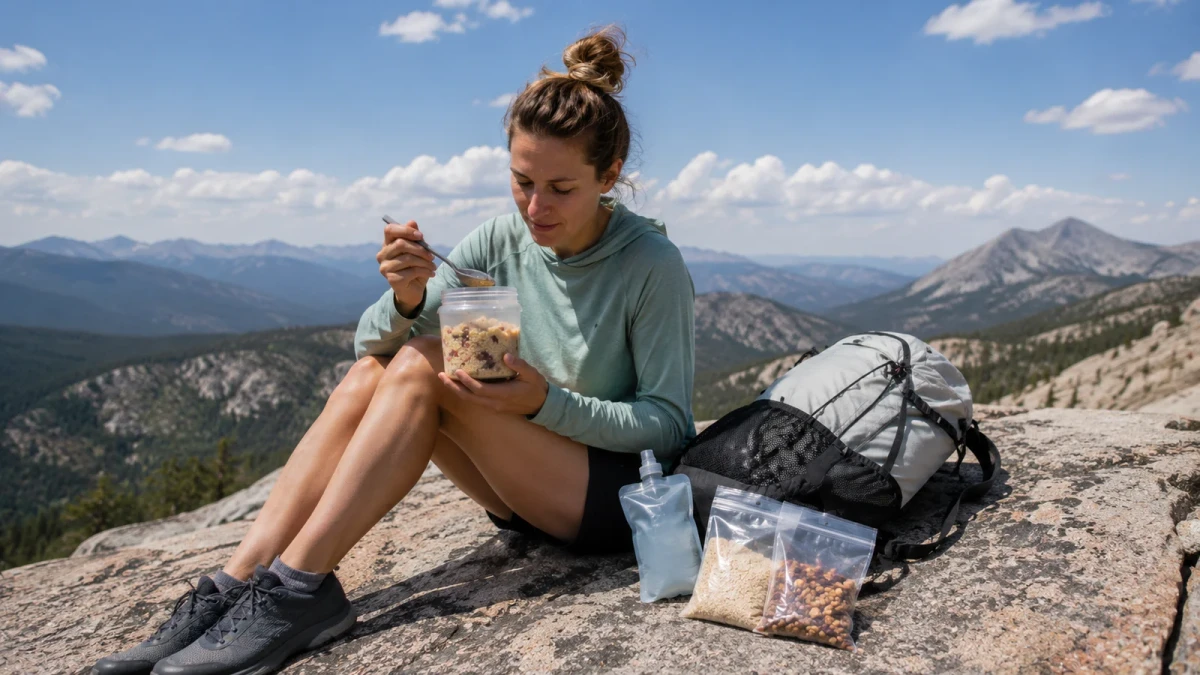
Part 38 of the HikeLab Ultimate Ultralight Guide Series.
If you can cut your stove, fuel, pot, and cleanup in one move, why do so many hikers still end up dreading dinner? The issue usually is not cold food. It is a bad plan. A real cold soak backpacking food system turns stoveless eating from a compromise into a repeatable trail advantage.
Most backpackers agree on the upside. Less gear sounds great. Less time in camp sounds better. But the promise falls apart when meals turn soupy, crunchy, bland, or just too small to fuel a long day.
This guide fixes that. You will learn when a cold soak backpacking food system makes sense, which foods work, what container to carry, how to time your soaking, and where most hikers get it wrong. By the end, you will know how to build a simple stoveless setup that saves weight without wrecking morale.
Key Takeaways
- A good cold soak setup is a full system that includes container choice, food selection, water planning, soak timing, and cleanup.
- The best cold soak backpacking meals use foods that rehydrate predictably, like couscous, instant potatoes, oats, ramen, refried beans, and instant hummus.
- Cold soaking is not ideal for every trip. Cold weather, high altitude, poor water access, and low morale can all make a stove the better call.
- Most bad cold-soak experiences come from poor food choices and bad timing, not from the method itself.
Why a Cold Soak Backpacking Food System Works
A cold soak backpacking food system works because it removes friction from the day. You stop carrying fuel. You stop budgeting boil times. You stop scrubbing a pot in fading light. For many hikers, that matters as much as the weight savings.
The system also fits how many people already eat on trail. Breakfast is often oats. Lunch is already no-cook. Dinner only becomes “cooking” because boiling water feels normal in backpacking culture. If the same calories can rehydrate in a jar while you hike, your routine gets simpler fast.
Sam learned this on a four-day section hike in southern Utah. His normal hot-food kit added up to almost a pound and a half once he counted stove, fuel canister, pot, lighter, and windscreen. He switched to a cold soak backpacking food system built around oats, couscous bowls, ramen, and bean mixes. He cut weight, saved time at camp, and started eating sooner every night.
That is the real win. Cold soaking is a workflow upgrade for hikers who value speed, simplicity, and fewer moving parts.
If you are testing stoveless backpacking for the first time, do not start by chasing the lightest possible setup. Start by building the most repeatable one.
When a Cold Soak Backpacking Food System Makes Sense and When It Does Not
The best cold soak backpacking food system is not universal. It shines in some conditions and feels miserable in others. Your job is to match the method to the trip instead of forcing the trip to fit the trend.
Cold soaking makes the most sense on warm to mild three-season trips, especially when water is easy to find and your meals do not depend on comfort as much as efficiency. It also works well on shorter trips where you already know the foods you like. Many hikers use it on fast overnights, dry summer weekends, and long mileage days when they want camp chores close to zero.
It can also make sense in areas with fire concerns. The U.S. Forest Service advises hikers to check local restrictions before leaving, and its Know Before You Go fire guidance is a good reminder that less flame can mean less hassle.
Cold soaking usually makes less sense in shoulder season, persistent cold rain, or high alpine trips where hot food is doing emotional work as much as nutritional work. Texture can also get worse at altitude, and some commercial meals rehydrate more slowly.
Tasha found that out in Colorado. She brought only stoveless backpacking meals for a windy three-day loop above 11,000 feet in late September. The meals worked, but dinner felt like a cold chore after long exposed miles. On her next trip she used a mixed system: cold-soak lunches, one hot dinner, and instant breakfast. Her energy improved, and so did her mood.
Use this quick decision filter:
- Choose cold soaking when the weather is mild, your water access is reliable, and your priority is simplicity.
- Choose a mixed system when you want lighter lunches and breakfasts but still want one hot meal.
- Choose a stove when the trip is cold, morale-sensitive, or likely to involve long wet evenings.
Before you buy a jar or rebuild your food bag, write down the exact trip where you plan to use it first. Conditions decide whether cold soaking feels smart or stubborn.
The 5-Part Cold Soak Backpacking Food System
Most articles stop at meal ideas. That is not enough. A dependable cold soak backpacking food system has five parts.
1. Container
Your container matters more than people think. It should be leak resistant, wide enough to eat from, simple to clean, and light enough that it still beats carrying a cook kit. A common sweet spot is a plastic jar in the 16- to 24-ounce range.
2. Meal categories
Cold soak backpacking meals work best when they fall into clear groups. Think breakfasts, quick lunches, dinner bases, and calorie add-ons. Once you know your reliable categories, planning gets easier and cheaper.
3. Water strategy
This is where many cold-soak setups break down. If dinner needs a full jar of water and the next source is dry or questionable, your “simple” system stops being simple. Plan soaking around known sources. If water is limited, favor foods that rehydrate with less volume.
4. Soak timing
Timing turns average food into good food. Oats might need 10 to 20 minutes. Ramen can soften in 20 to 30 if broken up. Couscous often works in 10 to 15. Beans and potatoes can want longer. Start early and let the trail do the waiting for you.
5. Cleanup and odor control
Cold soaking is easy to clean only if you finish the meal cleanly. Thin sauces, sticky peanut butter, and cheese powder can leave residue fast. A small splash of water right after eating solves most of the problem. Good food storage still matters too. Leave No Trace’s Seven Principles overview is a useful refresher if your system is getting sloppy around camp.
When Ben switched to cold soaking on the Arizona Trail, his first week was rough because he treated every food the same. Once he started labeling meals by soak time and water needs, dinner became automatic. He stopped guessing, wasting water, and carrying “backup” snack calories for failed meals.
That is what a cold soak backpacking food system does. It removes guesswork.
Best Foods for Cold Soaking Backpacking Meals
If you are asking what foods cold soak best for backpacking, the short answer is this: foods that are pre-cooked, thin, small, or highly processed usually perform best. Foods that depend on heat to fully soften, melt, or combine usually perform worst.
Here is the practical breakdown for best foods for cold soaking backpacking.
Best performers
- Couscous: fast, reliable, and easy to flavor with oil, spices, tuna, or dehydrated beans
- Instant mashed potatoes: fast calories, easy texture, and forgiving water ratios
- Instant oats: strong breakfast base with chia, dried fruit, powdered milk, or nut butter
- Ramen: works better when crushed first and paired with peanut butter, oil, or seasoning
- Refried bean flakes: solid for burrito-style meals and high satiety
- Instant hummus: excellent lunch option with tortillas, crackers, or pretzels
- Chia and oat mixes: one of the easiest stoveless backpacking meals for breakfast
Workable foods
- Knorr-style rice or pasta sides, especially if pre-tested at home
- Small pasta shapes, but only when pre-cooked and dehydrated or very thin
- Freeze-dried commercial meals, though texture varies
- Dehydrated lentil mixes if the ingredients were already cooked before drying
Washington Trails Association has a useful practical guide to cold soaking backpacking meals, and one of its better points is that more packaged meals work cold than many hikers assume. The limit is usually patience and texture.
Poor choices
- Thick uncooked pasta
- Plain rice that was not pre-cooked
- Large beans that were not pre-cooked or dehydrated properly
- Meals that depend on melted cheese or fat for the final texture
- Anything you already dislike when it is hot
Texture matters more than people admit. A food can be edible and still be a terrible trail meal. That is why a backpacking cold soak guide should not just say “it works.” It should say whether the result is creamy, chewy, soupy, gritty, or still crunchy.
Pick three foods from the “best performers” list and test them this week at home with the exact jar you plan to carry. That one experiment will save you from a lot of trail-side regret.
How to Build a Full Day of Cold Soak Backpacking Food
A cold soak backpacking food system gets much easier when you stop thinking in isolated dinners. Build a full day instead. That helps with calories, variety, and morale.
Breakfast is the easiest place to start. Overnight oats with chia, dried fruit, powdered milk, and nut butter are cheap, filling, and familiar.
Lunch often needs almost no change. Tortillas with instant hummus, hard cheese, shelf-stable sausage, peanut butter, or tuna already fit a stoveless day. If you want a true soak meal at midday, couscous salad with olive oil and spices is simple and reliable.
Dinner is where the system earns its keep. Good cold soak backpacking meals for dinner usually combine a quick carb base with fat, salt, and one texture contrast. Think ramen plus peanut butter and chili flakes. Think refried beans, taco seasoning, and crushed chips.
Snacks still matter. A cold soak backpacking food system is lighter on cooking effort, not lighter on calorie needs. Nuts, bars, candy, jerky, dried fruit, and nut butter packets fill the gaps.
Here is a simple full day:
- Breakfast: overnight oats with chia, powdered milk, raisins, and peanut butter
- Lunch: tortilla wraps with instant hummus and salami
- Afternoon snack: trail mix, candy, and an electrolyte drink
- Dinner: couscous with refried beans, olive oil, taco seasoning, and Fritos
- Dessert: pudding mix or a cookie bar
This is also where a mixed system can make sense. Some hikers use cold-soak breakfasts and lunches, then save one hot dinner for the end of the day.
One planning habit makes the whole day easier: write the water amount and soak time for each meal directly on its bag. Once those two numbers are fixed, you stop making decisions at the end of a long day, which is exactly when cold-soak meals usually go wrong.
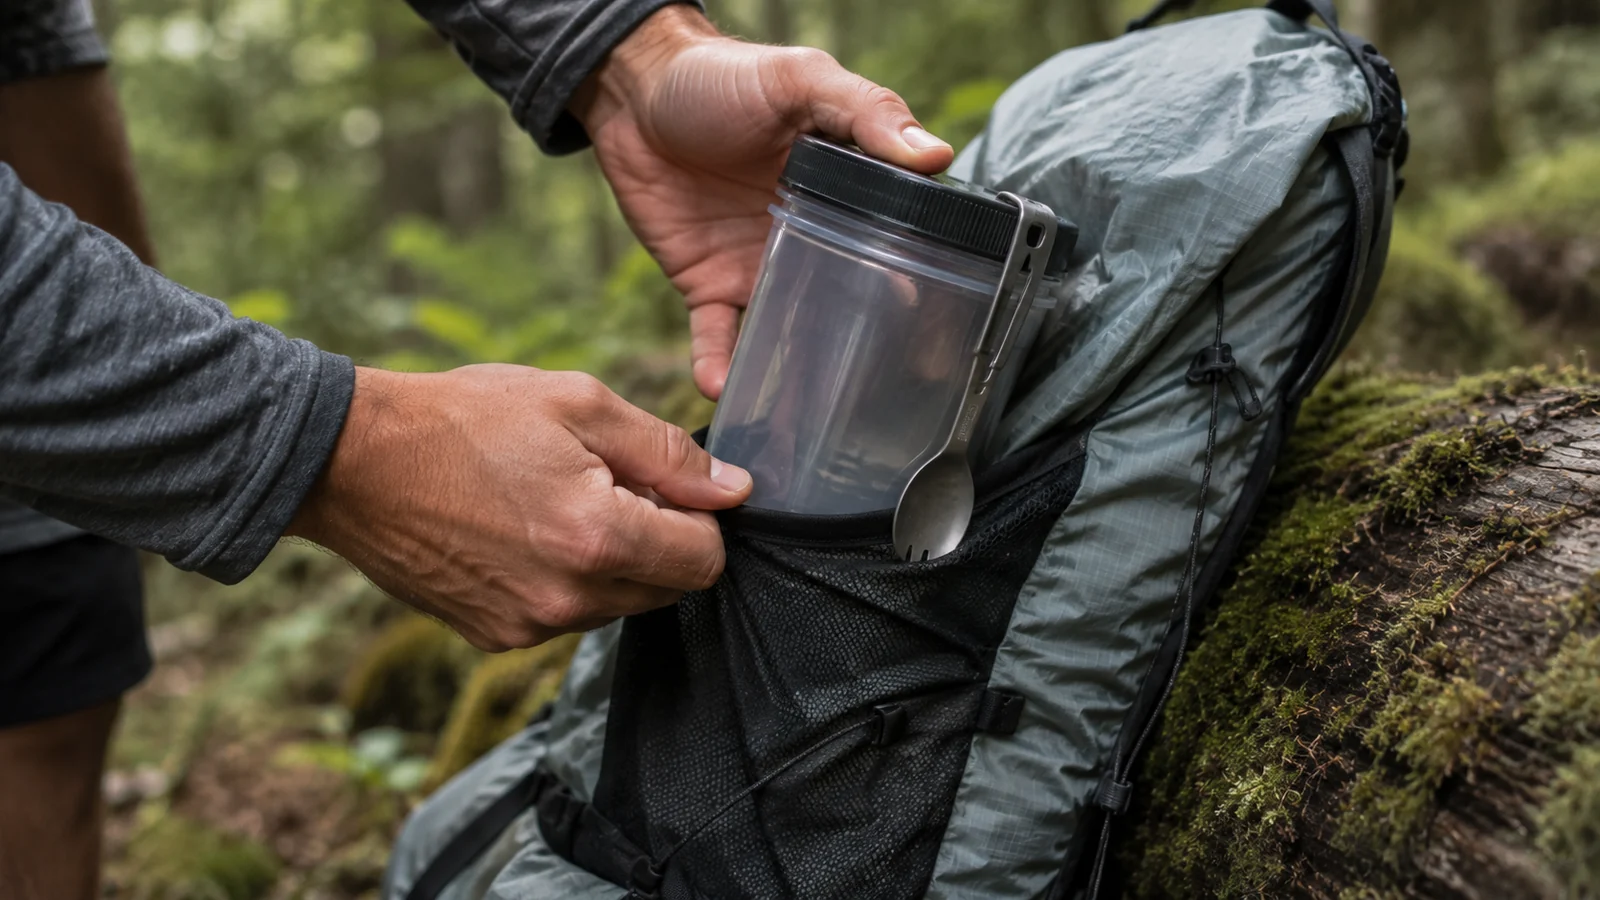
Cold Soak Containers, Tools, and Lightweight Setup
The ideal cold soak container backpacking setup is boring. That is a good thing. You want a jar that seals, survives getting stuffed into a side pocket, and does not make you hate cleanup.
Look for four traits first:
- Wide mouth so you can stir and eat without coating your knuckles
- Secure lid that resists leaks in a moving pack
- Enough volume for your biggest meal plus stirring room
- Smooth interior that rinses clean without much effort
Many hikers use plastic jars that originally held peanut butter, gelato, or drink mixes. Others use purpose-made reusable containers. You do not need a premium product. You need something reliable and easy to replace.
Beyond the jar, keep the tool list short:
- Long-handled spoon
- Small zip bags or meal bags
- Tiny bottle of olive oil if you use fats to boost calories
- Food bag or bear-safe storage that fits the jar
- Optional elastic band to quiet rattling
Skip the urge to over-engineer it. A dedicated insulated sleeve, a mini funnel, and backup container usually solve problems you do not actually have.
If you are deciding between hot and cold systems mostly on pack weight, REI’s stove fuel planning guide shows how quickly stove systems add up once you factor in fuel for multiple meals.
Common Cold Soak Mistakes That Ruin Meals
Most complaints about cold soaking are real. They are also usually fixable. A cold soak backpacking food system fails when hikers improvise too much or test nothing before the trip.
Mistake 1: Choosing the wrong foods
The biggest problem is expecting every backpacking food to behave the same. It does not. Thin, pre-cooked foods win. Dense or raw foods fight back.
Mistake 2: Adding water without measuring
Too much water gives you soup. Too little gives you crunch. Once you dial in a meal, write the water amount on the bag with a marker and stop guessing.
Mistake 3: Starting the soak too late
A meal that needs 30 minutes does not belong in a jar five minutes before camp. Start your soak at the last water source or during a mellow stretch of trail.
Mistake 4: Ignoring hygiene
Sticky residue in a warm jar is not just gross. It can attract animals and make the next meal taste wrong. Rinse early, seal well, and store food carefully.
Mistake 5: Making your first test a real trip
Home testing is part of the system. It tells you what textures you can live with and what foods belong on the “never again” list.
Morale matters here. If you already know you hate cold pasta, do not bring cold pasta because the internet said it is efficient. Efficient food that you refuse to eat is just dead weight.
Sample Cold Soak Meal Plan for a 1- to 3-Day Trip
If you want a cold soak backpacking food system you can copy right away, start here. This plan assumes mild weather, moderate mileage, and easy water access.
Day 1
- Lunch: tortillas, instant hummus, and jerky
- Dinner: couscous, refried beans, olive oil, taco seasoning, and crushed chips
- Snacks: trail mix, candy, nut butter packet
Day 2
- Breakfast: overnight oats with chia, powdered milk, raisins, and maple sugar
- Lunch: ramen salad with crushed noodles, peanut butter, soy sauce packet, and chili flakes
- Dinner: instant potatoes with bacon bits, parmesan, and olive oil
- Snacks: bars, dried fruit, nuts, electrolyte mix
Day 3
- Breakfast: cold muesli with powdered milk and dried blueberries
- Lunch: tortilla wrap with tuna packet and mayo packet
- Hike out snacks: candy, salted cashews, jerky
This sample is intentionally simple. It uses foods that are cheap, easy to find, and realistic for first-time cold soakers.
If you are building your own version, keep these guardrails:
- Repeat foods that already worked
- Use fat and salt to improve satisfaction
- Vary textures across the day
- Keep one morale food you genuinely enjoy
That last point matters more than spreadsheets do. A strong cold soak backpacking food system should feel sustainable, not punishing.
FAQ
How do you start a cold soak backpacking food system?
Start with one leak-resistant wide-mouth jar, three easy meals you have tested at home, and a simple plan for water and soak timing. Do not begin with complicated recipes. Build around oats, couscous, potatoes, ramen, beans, and hummus first.
What foods cold soak best for backpacking?
The best foods for cold soaking backpacking are couscous, instant mashed potatoes, oats, ramen, refried bean flakes, instant hummus, and chia-based breakfast mixes. They rehydrate fast and are easy to customize.
Why do some cold soak backpacking meals turn out crunchy?
The usual causes are wrong food choice, too little water, or not enough soak time. Altitude and cold weather can slow rehydration too. Testing meals at home is the fastest fix.
Which cold soak container is best for backpacking?
The best cold soak container backpacking setup uses a wide-mouth plastic jar with a secure lid, enough room to stir, and a smooth interior that rinses clean. Fancy gear is optional. Leak resistance and ease of use matter more.
When should you skip cold soaking and bring a stove instead?
Bring a stove when the trip will be cold, wet, high, or emotionally demanding enough that hot food adds real value. A stove also makes more sense when water is scarce or when your best meal options need heat to be enjoyable.
Build a Cold Soak System You Will Actually Use
A cold soak backpacking food system is not about proving you can suffer through cold noodles. It is about removing unnecessary gear while still eating enough, recovering well, and keeping your day simple. When it works, it feels efficient, clean, and freeing. When it fails, it usually fails for predictable reasons: the wrong foods, bad timing, too little testing, or using a stoveless plan on the wrong trip.
That is good news, because those problems are fixable. Start with a mild-weather overnight. Choose one reliable jar. Build your meals around foods that rehydrate well and taste fine cold. Write down water amounts and soak times. Then repeat what works.
If you have been curious about stoveless backpacking meals, test the system before your next trip instead of debating it for another month. Run one home trial tonight, pack one easy overnight menu, and let the results decide. Then refine your cold soak backpacking food system from actual trail experience, not gear-forum theory.
Next Steps
- Read Ultralight Cooking Systems for the full stove comparison including hot systems.
- Check Bear Safety & Food Storage for storing a soaking jar safely overnight.
- Review Food Resupply Strategy for planning meals on long trails.
Sources
- Washington Trails Association — How to Cold Soak Your Meals — field-tested stoveless technique
- REI — How Much Stove Fuel Should I Take? — the weight a stove system actually costs
- U.S. Forest Service — Know Before You Go: Fire — fire restrictions that favor stoveless trips
- Leave No Trace — Seven Principles — food residue, odor, and camp hygiene
Leave a Comment