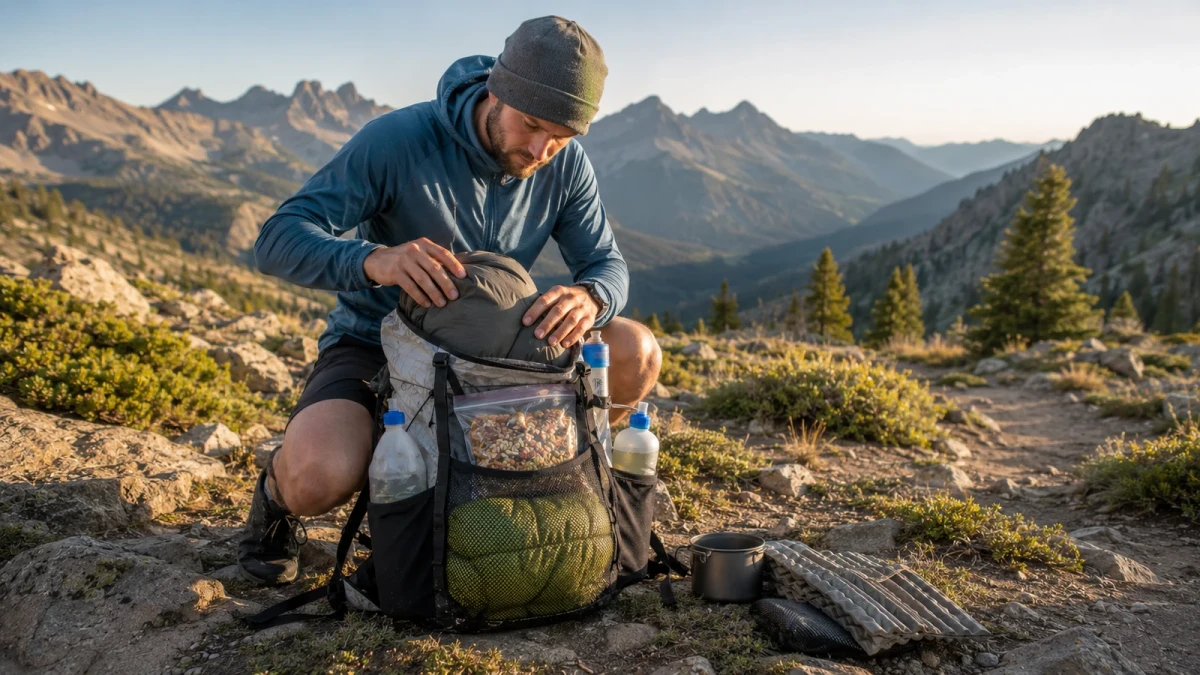
Part 31 of the HikeLab Ultimate Ultralight Guide Series.
A poorly packed ultralight pack can feel worse than a heavier one. When the load sits too high, too far back, or pulls away from your spine, every uphill step costs more energy and every descent feels less stable.
That is why learning how to pack a backpack for ultralight hiking is not just about fitting gear into a smaller bag. It is about making your pack ride close, balanced, weather-ready, and easy to live out of for hours at a time. Good packing turns the same kit into a lighter-feeling system.
In this guide, we will use a simple 4-zone method, then adjust it for food-heavy carries, wet weather, bear canisters, and real-world ultralight mistakes.
If you need the short version, this is how to pack an ultralight backpack:
- Put bulky, soft sleep gear at the bottom.
- Place heavy, dense items in the middle and close to your back.
- Keep layers, rain gear, and first aid near the top.
- Store water, snacks, and wet items in exterior pockets for quick access.
Key Takeaways
- Packing technique matters almost as much as total pack weight.
- The best ultralight setup keeps dense items centered and close to your spine.
- Pack by access frequency, not just by category.
- Exterior pockets should hold useful trail items, not become overloaded junk drawers.
- Trip length, bear canisters, and long water carries should change your packing plan.
If your current pack always feels too big, too floppy, or awkwardly top-heavy, start by comparing your packing method with What Pack Volume Do You Actually Need? The Ultralight Backpack Size Guide and The Beginner Ultralight Gear List for 2026. Better packing works best when the gear system already makes sense.
Start With Your Ultralight Packing Strategy, Not Your Pack
Before you start stuffing gear into compartments, zoom out. The best ultralight backpack packing tips happen before the first item goes in.
Ultralight hiking works because every item has a job, and ideally more than one. If your base weight is dialed in, your packing becomes simpler, your load becomes denser, and your pack carries better. If your gear list is bloated, even perfect organization will only hide the problem.
Start with four decisions:
Match pack volume to the trip, not your fears. A bigger pack invites extra gear. A smaller pack forces better choices. For many hikers, a 35L to 50L pack works for typical ultralight overnights and short trips, while longer resupplies or shoulder-season kits may need more room.
Cut redundant storage. Too many stuff sacks create dead space, extra ounces, and awkward shapes. In most cases, your quilt, extra layers, and shelter components can be packed loose or grouped in just a few waterproof bags.
Repackage consumables. Food packaging is bulky. Fuel setups are often overbuilt. Trim cardboard, split bulk items into daily rations, and carry only what the route demands.
Plan around the hardest carry of the trip. The real test is not mile two from the trailhead. It is the day you leave town with four days of food, a full water load, and maybe a bear can. Pack for the heaviest version of the trip.
If you are still refining your overall system, first tighten your overall kit and volume assumptions. HikeLab’s What Pack Volume Do You Actually Need? The Ultralight Backpack Size Guide is the best companion piece before you obsess over load placement.
How to Pack a Backpack for Ultralight Hiking With the 4-Zone Method
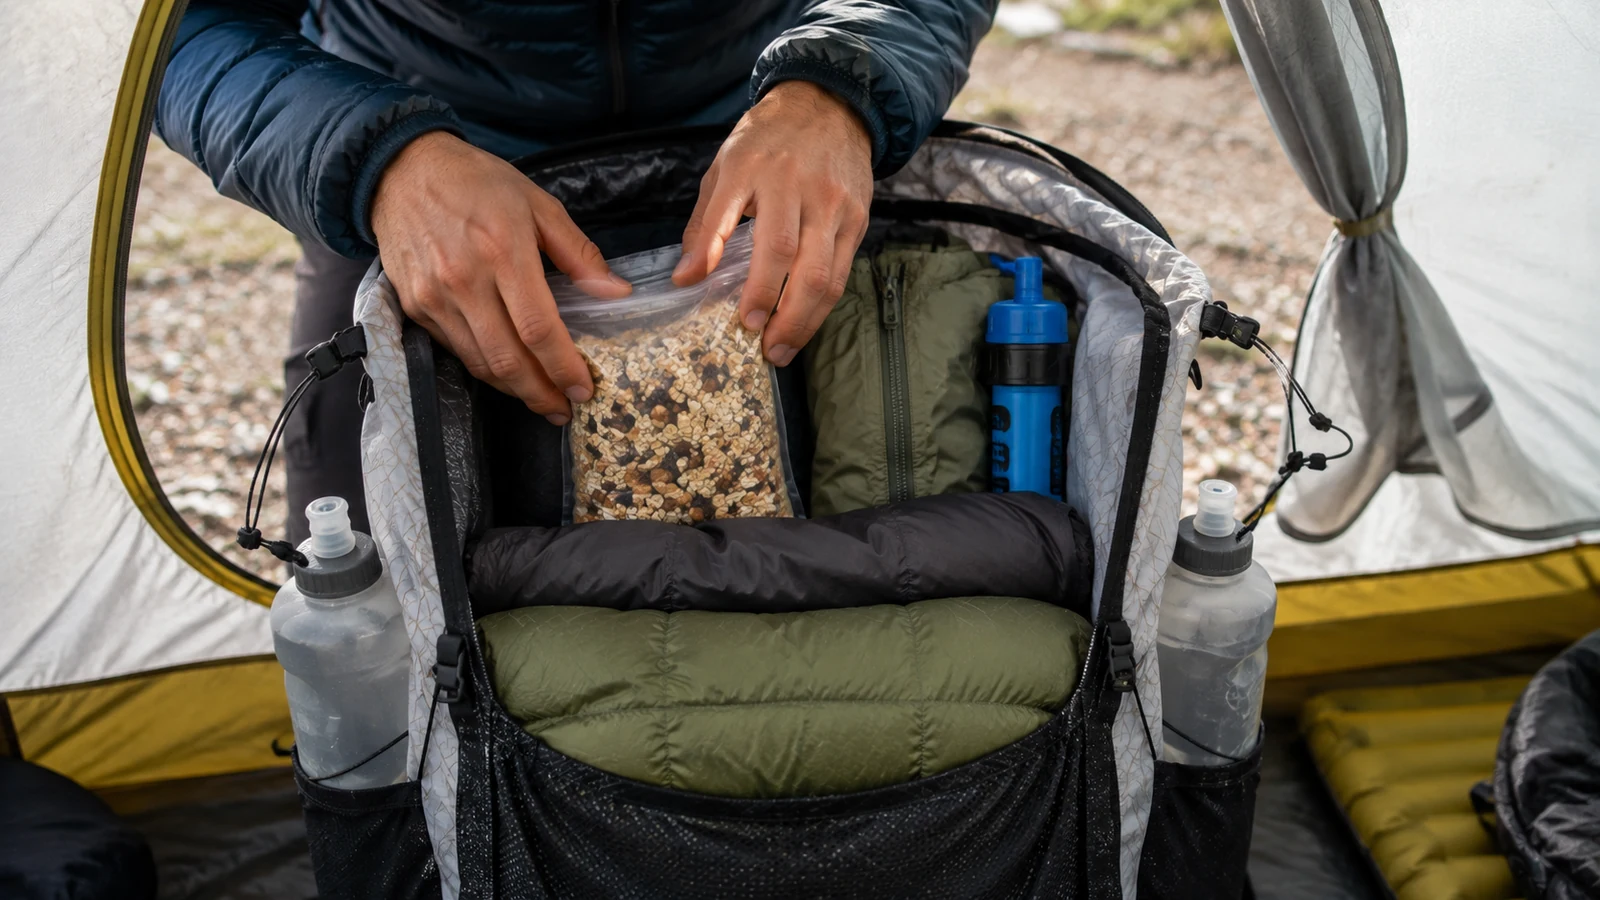
The simplest answer to how to pack an ultralight backpack is to use a four-zone system: bottom, middle, top, and exterior pockets.
This approach works because it balances three goals at once:
- stable weight distribution
- quick access to high-use items
- protection for gear you must keep dry
Think of your pack as a moving center of gravity. Heavy items should sit near the middle of your torso, close to your back. Light, bulky items can fill dead space. Frequently used items should be reachable without unpacking half your load.
Here is the basic logic:
- Bottom zone: soft, bulky, low-use gear
- Middle zone: heavy, dense gear close to the spine
- Top zone: moderate-weight items you may need during the day
- Exterior pockets: water, snacks, wet gear, and quick-access essentials
This is consistent with the zone-based advice used by REI, but it becomes even more important with frameless and minimal-frame packs. Ultralight packs have less structure to hide bad packing. If you get the load shape wrong, you will feel it immediately.
If your pack still rides badly after you clean up the load order, revisit your volume and category choices in What Pack Volume Do You Actually Need? The Ultralight Backpack Size Guide. A packing problem is often a gear-system problem wearing a different mask.
How to Pack a Backpack for Ultralight Hiking by Trip Type
Most articles stop at packing zones. Real trail packing is more dynamic than that. Your ideal layout changes with the trip.
Overnight or weekend trip
This is the easiest ultralight carry. Food volume is low, water carries are usually short, and your pack can stay compact.
- Put your quilt and sleep clothes at the bottom
- Keep shelter body and stakes together, but separate wet items if needed
- Place food in the middle or upper-middle zone
- Use exterior pockets for snacks, water filter, rain shell, and water bottles
3-day trip
This is where bulk starts to matter more than weight alone.
A common beginner mistake is packing the first longer trip as if every item deserves prime real estate. Tomas, a Central European weekend hiker, fixed his shoulder fatigue simply by moving food lower and closer to the back panel, then demoting low-use extras out of the extension collar. Same pack. Same gear. Much better carry.
- Compress soft gear at the bottom to create a stable base
- Center food close to your back rather than letting it ride high
- Avoid filling the extension collar with dense items that raise the center of gravity
- Reserve one pocket for daily-use items so you do not dig through the main body at every stop
Thru-hike resupply carry
After town, food is often your heaviest category. That changes everything.
- Food should ride mid-pack, not dangling from the top or stuffed into random gaps
- Put day-one food where it is accessible, but keep the bulk of the load centered
- Repack food into compact bags by day or meal type
- Expect the pack to carry best after the first full day, once food weight drops
Greenbelly’s thru-hiker-oriented guide gets this right: organize by when you use items, not just what they are.
Bear-can trip
Bear canisters are rigid, awkward, and unforgiving. They often dictate the whole pack layout.
- Place the can horizontally if the pack allows and it sits close to your back
- If horizontal carry wastes space, go vertical and brace it with soft items
- Keep hard edges from pressing into your spine by padding with clothing or your quilt
- Do not let the can ride too high above shoulder level
Long dry stretch with heavy water carry
Water is one of the fastest ways to ruin an otherwise clean ultralight setup.
- Treat extra water as temporary ballast
- Place the densest water weight close to the center of the pack
- Spread bottles so the pack does not pull to one side
- Carry only route-appropriate water after checking reliable sources and seasonal conditions
If you consistently overcarry, review your water planning workflow along with your gear list. Smarter logistics often save more weight than buying lighter hardware.
What Goes in the Bottom, Middle, Top, and Exterior Pockets
Here is a practical ultralight backpacking gear organization table you can follow on most trips.
| Pack Zone | What Goes There | Why |
|---|---|---|
| Bottom | Quilt or sleeping bag, sleep clothes, inflatable pad, pack liner contents that must stay dry | These items are light, bulky, and usually not needed until camp |
| Middle | Food bag, cook kit, bear canister, dense extra layers, electronics, heaviest water carry if stored inside | This keeps the heaviest mass centered and close to your back for stability |
| Top | Rain jacket, wind layer, first aid kit, headlamp, toilet kit, map, gloves, puffy if conditions change fast | These are moderate-weight items you may need without emptying the pack |
| Exterior Pockets | Water bottles, filter, snacks, wet shelter, trash, phone, sun gear, bug spray | Quick access saves time and keeps wet or messy items out of your dry pack interior |
A few item-specific notes matter:
Bottom zone
Pack soft gear loose when possible. A quilt fills dead space better than a tightly compressed cylinder. If you use a pack liner, line the pack first and place your dry sleep system inside it.
Middle zone
This is the engine room. If an item is heavy and dense, ask whether it can sit closer to your back panel. In many packs, food and a cook pot belong here. If your shelter is wet, you may choose to keep it outside the liner or in an exterior pocket instead.
Top zone
The top should support fast decisions, not clutter. If you stop because a storm rolls in, your rain shell should be reachable in seconds. Same with warm layers on a windy ridge.
Exterior pockets
External storage is useful, but it is easy to overdo. Stretch pockets tempt hikers into carrying too many “maybe” items where they bounce, snag, and throw off balance. Store high-use essentials there, not your indecision.
If you are rebuilding your whole setup from scratch, pair this guide with The Ideal 3-Season Ultralight Gear List for Central Europe so your organization supports the gear instead of fighting it.
How to Pack for Balance, Comfort, and Easy Trail Access
The goal of weight distribution in a hiking backpack is simple: keep the load stable, close, and easy to carry over uneven terrain.
Three rules matter most.
1. Keep dense weight close to your spine
A pack that pulls backward forces your shoulders and lower back to compensate all day. Dense items should sit against the back panel or as close as your pack design allows.
2. Build a compact column, not a lumpy pile
Empty gaps, odd-shaped bundles, and randomly stuffed gear create barreling and sway. Use soft items to fill voids so the load becomes one stable mass. If you are switching to a frameless pack and your load still feels unstable, visit HikeLab’s Ultralight Backpack Guide for pack shape and frame-sheet options that directly affect load stability.
3. Pack by use frequency
The less often you unpack on trail, the more efficient your day becomes. Ask yourself:
- Will I need this while walking?
- Will I need this only during a break?
- Will I need this only at camp?
That one filter improves almost every packing decision.
For frameless packs, structure becomes even more important. Some hikers use a folded foam pad or carefully placed soft gear to create a pseudo-frame. If you hike with a frameless model, shape matters nearly as much as weight.
Chicken Tramper Ultralight Gear’s advice on center of gravity is especially relevant here: if heavy items drift too far from your back, even a light load can feel unstable. Their guide is worth a read for pack-shape examples: How to Pack a Backpack for Hiking Like a Pro.
Also remember that comfort is not just inside the pack. Once loaded:
- tighten the hip belt first
- snug shoulder straps second
- adjust load lifters only if your pack has them and they are designed to work
- recheck fit after 20 to 30 minutes on trail
A pack often settles after the first mile. Small strap adjustments then can fix pressure points before they become real problems.
Ultralight Adjustments for Bear Canisters, Wet Weather, and Long Water Carries
These are the scenarios that expose weak packing habits fast.
Bear canisters
Bear cans are often mandatory, and they are rarely elegant.
Best practices:
- Test horizontal and vertical orientation at home before the trip
- Pad contact points with soft gear
- Keep the can as centered as possible
- Do not stack too much unstable gear above it
If you need help choosing a compliant canister or understanding area-specific rules, check the National Park Service bear safety pages and HikeLab’s Bear Safety & Food Storage for Ultralight Backpacking before your trip.
Wet weather
Rain changes the order of operations.
- Use a pack liner for critical dry gear
- Keep rainwear and shelter accessible near the top or in exterior storage
- Separate wet shelter fabric from your quilt and sleep layers
- Expect to repack at breaks as conditions shift
In prolonged wet weather, “dry” and “accessible” become your top priorities. A slightly less elegant load is fine if it protects your sleep system. Elena, a Czech thru-hiker on the Bohemian Forest Trail, solved her recurring pack-sag problem on wet days by switching from a bottom-only pack liner to a full-body compactor bag for her quilt and sleep layers — same weight, no more soggy insulation at camp.
Long water hauls
Dry stretches change ultralight math because water is non-negotiable.
- Put the heaviest water nearest your centerline
- Balance side pockets so one side is not much heavier
- Consider one internal bladder or centered bottle only if it truly improves carry
- Reduce bulk elsewhere so temporary water weight does not overfill the pack
This is where many hikers make poor decisions. They either under-plan and run dry, or they overload with unnecessary backup water “just in case.” The fix is better route intelligence, not blind overpacking. If your carries keep ballooning after every town stop, also review Food, Calories & Resupply Strategy for European Thru-Hikers, because food and water planning often fail together.
7 Common Ultralight Packing Mistakes That Make Your Pack Feel Heavier
Even with a low base weight, bad organization can make the pack feel worse than it should.
1. Packing heavy items too high
This makes the pack top-heavy and less stable, especially on descents and off-camber trail.
2. Letting dense items sit far from your back
This creates strain against your shoulders and wastes energy every step.
3. Overstuffing exterior pockets
A few essentials are fine. Too much gear outside the pack causes bounce, imbalance, and snagging.
4. Putting hard items directly against the spine
Cook pots, bear cans, and electronics need padding or better placement. If it feels bad in the living room, it will feel worse by mile ten.
5. Carrying too much water without a route-based reason
Water is heavy. Carry what the stretch requires, not what anxiety suggests.
6. Using too many stuff sacks
Extra organization can become inefficient organization. More sacks mean more bulk, more dead space, and slower access.
7. Ignoring first-day adjustments
Your pack fit at the trailhead is only a starting point. Recheck strap tension, bottle balance, and pressure points after the pack settles.
Most of these mistakes come down to one issue: packing by habit instead of packing with intent.
FAQ
How do you pack an ultralight backpack?
Put soft sleep gear in the bottom, heavy food and dense items in the middle close to your back, quick-use layers near the top, and water plus snacks in exterior pockets. That gives you better balance, comfort, and access on trail.
What should be closest to your back in a hiking backpack?
The heaviest dense items should be closest to your back, usually food, a cook kit, or a bear canister if your pack shape allows it. This improves weight distribution in a hiking backpack and reduces backward pull.
Should sleeping bags go at the bottom of a backpack?
Yes. In most setups, a quilt or sleeping bag belongs at the bottom because it is light, bulky, and usually only needed at camp. It also helps create a soft base for the rest of the load.
How do you pack an ultralight backpack with a bear canister?
Keep the canister centered and close to your back, test horizontal versus vertical orientation before the trip, and cushion it with soft gear so it does not create pressure points. Avoid placing it too high where it destabilizes the pack.
What is the best way to organize gear in an ultralight pack?
Organize by both weight and access. Keep rarely used soft gear low, heavy items central, weather and safety gear high, and all-day essentials outside. Good ultralight backpacking gear organization supports both comfort and efficiency.
Packing well is one of the fastest upgrades you can make to your hiking experience. The same gear can feel tighter, lighter, and easier to manage when you stop treating your pack like storage and start treating it like a load-carrying system.
Before your next trip, do one full practice pack at home, walk around for ten minutes, then repack with a critical eye. Start by fixing only one thing: maybe the food bag sits too high, maybe the side pockets are overloaded, maybe your rain layer is buried too deep. Small corrections compound fast.
If you want to go further, pair this article with your pack-volume decisions, food-carry strategy, and bear-safety setup. That is where backpack comfort usually gets solved for real, not in the shop and not in a spreadsheet.
Next Steps in the HikeLab Series
- What Pack Volume Do You Actually Need? The Ultralight Backpack Size Guide
- The Beginner Ultralight Gear List for 2026
- The Ideal 3-Season Ultralight Gear List for Central Europe
- Bear Safety & Food Storage for Ultralight Backpacking
- Food, Calories & Resupply Strategy for European Thru-Hikers
Sources
- REI Co-op, guidance on ultralight backpack packing and general ultralight backpacking basics.
- Greenbelly, thru-hiker-oriented advice on access frequency and food-forward packing.
- Chicken Tramper Ultralight Gear, examples of center-of-gravity logic for ultralight packs.
- National Park Service, bear safety and food-storage guidance for regulated areas.
Leave a Comment